
What is Cura?
Ultimaker Cura Slicer is a free, open-source slicing software that allows you to prepare 3D models for printing. It’s a powerful tool that lets you customize your print settings, optimize your models for your specific printer, and preview your prints before sending them to your 3D printer.
Cura slicer software is easy to use. While the software has many settings, the interface is user-friendly and easy to navigate.
Before You Open the Cura Software
Before we get started, I need to clear up a few things. There are a number of misconceptions and expectations that we need to get clear on before we get into the nitty-gritty of using Cura.
Set It Up and Hit Print… Wrong
One of the biggest misconceptions about 3D printing is that you can simply load your model file up in Cura (or another slicer) and hit print. Unfortunately, that’s not how it works.
First, you will need to learn how to optimize the settings for your printer and the material you plan to use for your 3D print. I’m going to take you through all the basic settings and show you how to set up your first 3D print in Cura, so don’t worry. I want to drive home the importance of taking the time to understand the software and the printer settings before attempting to print anything.
Start with Simple Print Models
To avoid frustration (and a failed print), I highly recommend starting off with simple and less complex models. Once you get comfortable with the software and understand how the settings work, then you can move on to 3D print more complex models.
Starting out simple will give you the chance to get more experience under your belt with the software and how the settings affect a print before attempting more complex prints.
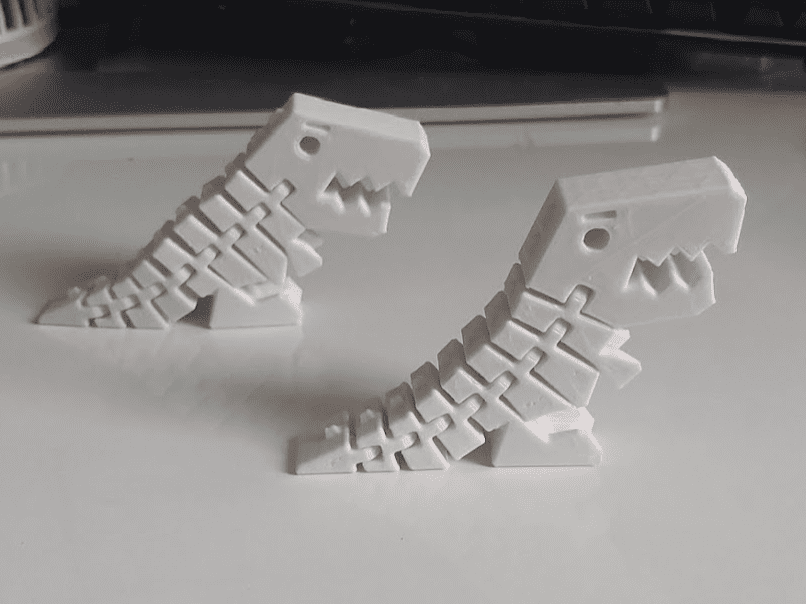
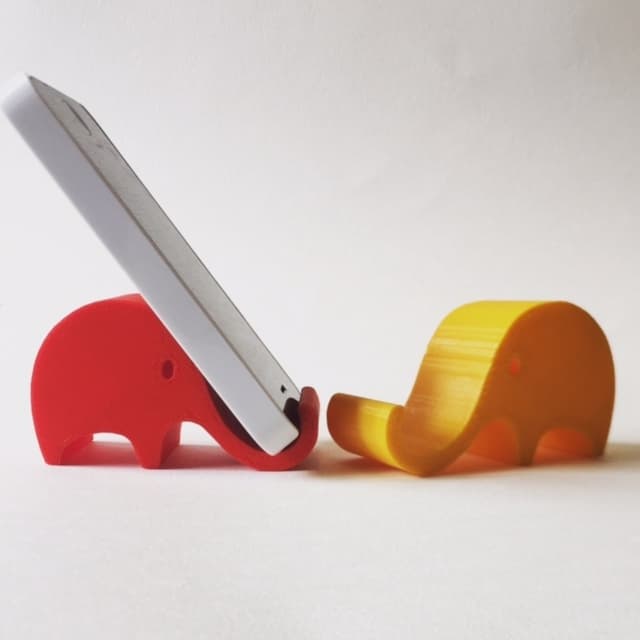
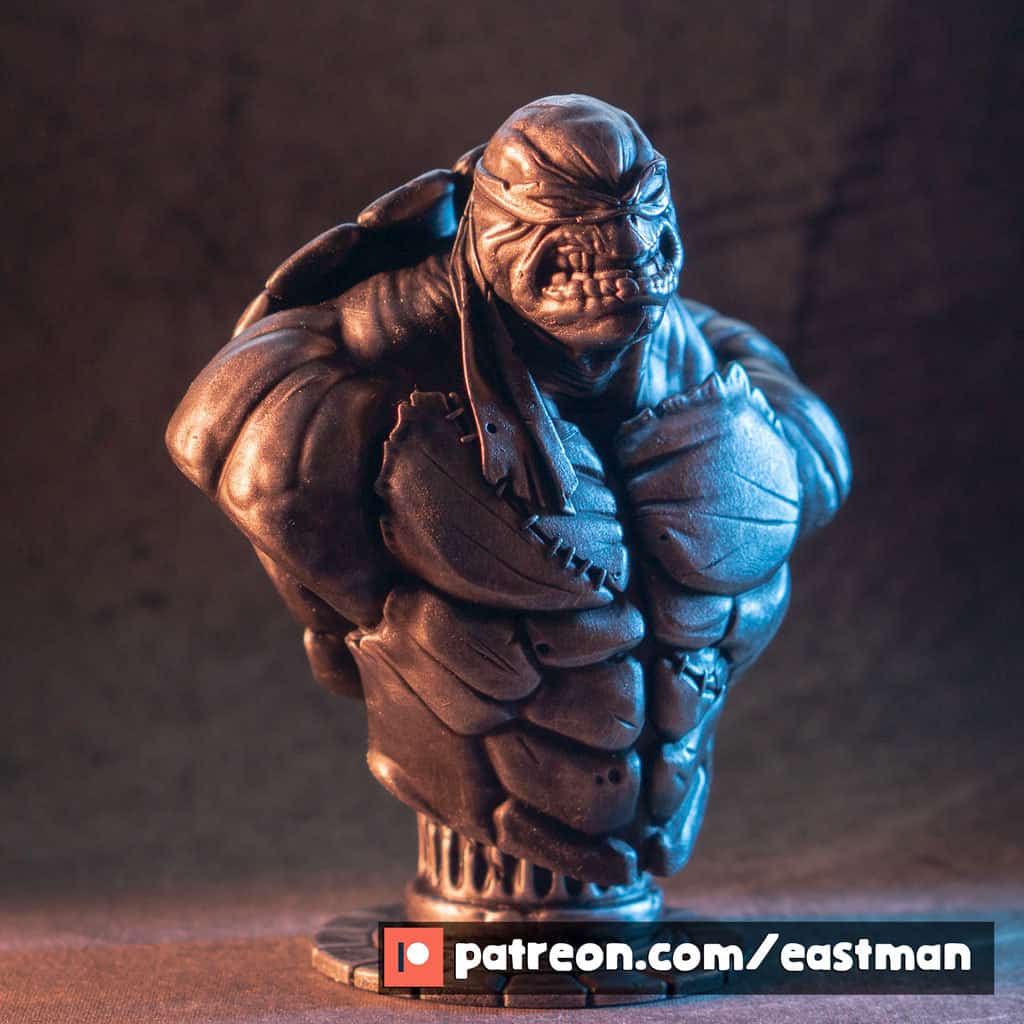
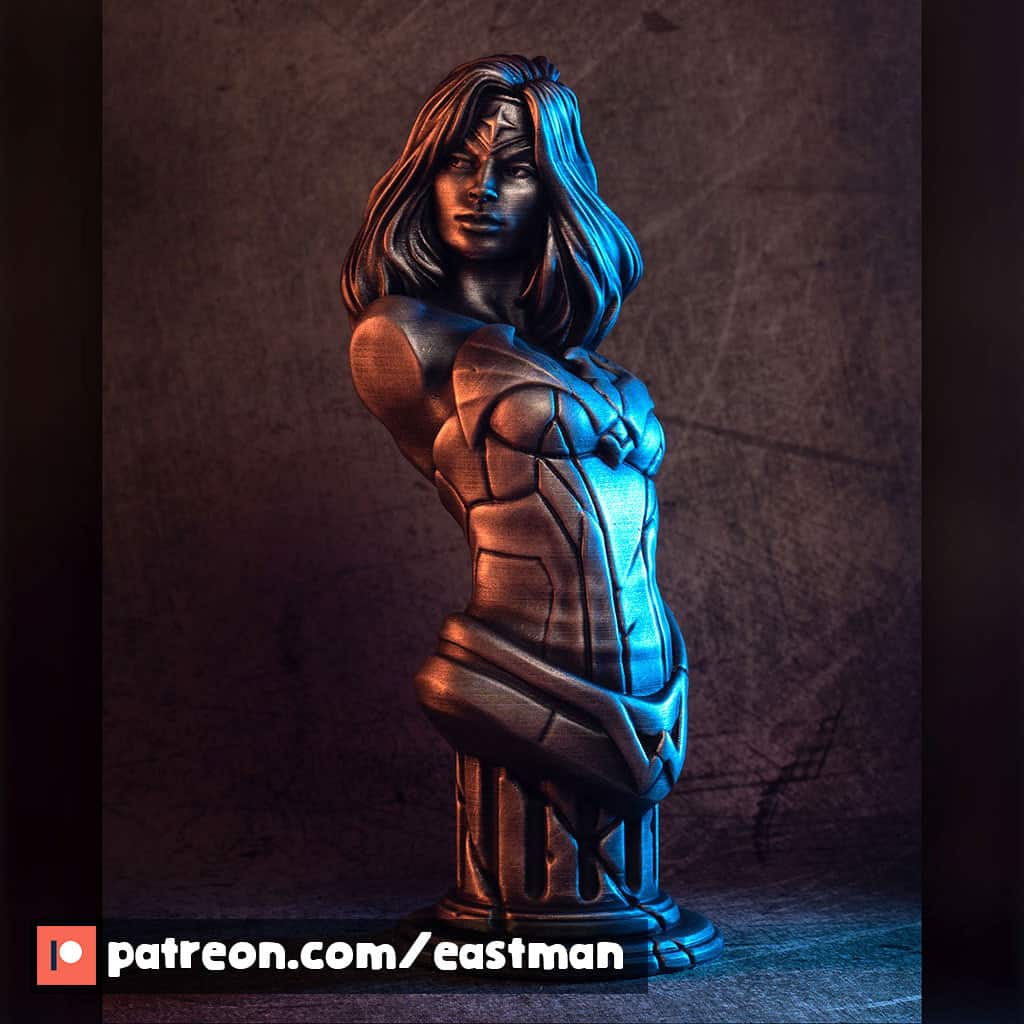
Great First Prints
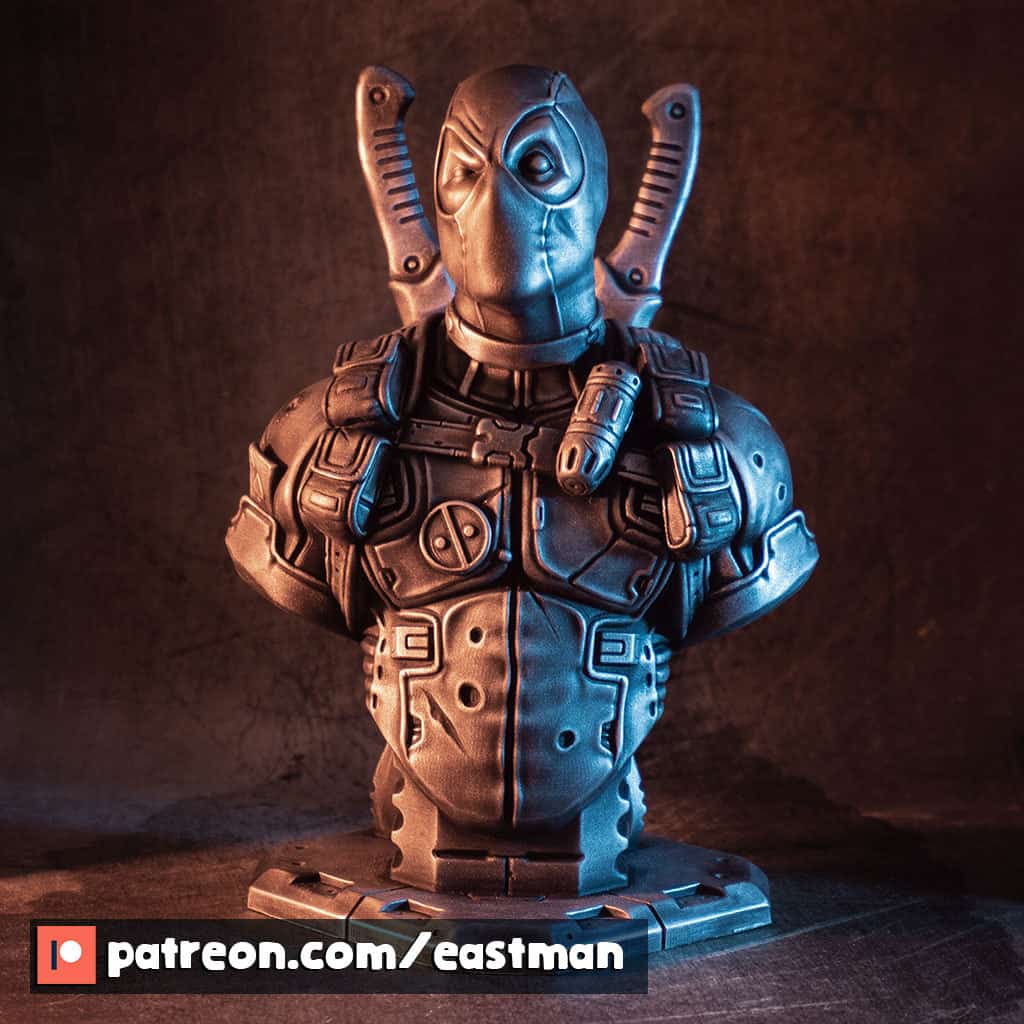
Support Free Busts
Never Stop Learning
3D printing is a constantly evolving industry, and there’s always something new to learn. It’s important to keep learning and experimenting to improve your skills and get better results.
The Importance of Using a 3D Slicer
A 3D slicer is a software that converts your 3D model into a series of 2D layers that your printer can recognize and understand. This language that your printer “speaks” is called G-Code. The slicer acts as a translator between the model file and the printer, an essential part of preparing your 3D models for printing.
Ultimaker Cura is one of the most popular 3D slicers out there, and definitely my favorite, but there are other free and paid slicers. We’ll get into that in a minute.
What is G-Code?
G-Code is the language created by the slicer, in this case, Cura, and acts as a set of instructions that tells your 3D printer how to create and build the 3D model. Your printer uses these instructions to understand how to move and extrude the filament. The 3D slicer generates this code based on the settings you choose, and it’s sent to the printer to create your object.

This is a very basic explanation of G-Code but there are many other resources to dive deeper into the more complex nuances such as understanding the basic syntax, functionality, and commands.
Ultimaker Cura Slicer Alternatives
While Ultimaker Cura is a great 3D slicer, other options are available. Prusa Slicer and Simplify3D are two popular alternatives, each with its own strengths and weaknesses.

Glossary
To help you navigate the world of 3D printing, having a glossary of terms is helpful. I have created a quick start guide with a glossary of terms on my website. It’s free to download, and you can do so at the link below.
FDM 3D PRINTING & ULTIMAKER CURA GLOSSARY
As a 3D printing enthusiast, I understand how challenging it can be to keep up with all the technical jargon and terminology. That’s why I’ve created this glossary to help beginners and experienced users alike understand essential terms and concepts related to 3D printing and Ultimaker Cura settings.
What Can You 3D Print?
The world is your oyster, as they say. There are millions of models and files available to 3D print, some for free, some you can buy.
Supported File Types in Cura
Cura supports a range of different file types for 3D models, including:
- STL: Standard Triangle Language or Standard Tessellation Language
- OBJ: Object file
- 3MF: 3D Manufacturing Format
STL is the most commonly used file format for 3D printing and is supported by most 3D modeling software. It is also the file type I will be using in this tutorial.
Where Can I Get 3D Model Files?
There are many websites where you can download 3D models for printing. Some have free files, while others, you can buy the file from the creator. Some of my favorites are listed below. These are by no means the only sources but just the ones that I frequently get my files from.


You can also create your own 3D models using 3D modeling or free CAD software like TinkerCAD. I’ve done an entire video series on how to use TinkerCAD, so make sure to check that out if you plan to have a go at creating your own models to 3D print.
https://www.youtube.com/watch?v=zIwrW4kcHTU&list=PLv65CP2QM2rH2LoPCkOiX_avoP4CglNi0Full Training Series: Taking Concepts to 3D Prints
How to Install Cura on Your Computer
Before you begin downloading Cura, make sure that your computer has the recommended hardware on board. You’ll want to be running the latest version of your operating system and be aware of the print file sizes you are using, especially if you are working with the minimum requirements.
Check out Cura Slicer System Requirements before we get rolling on the download.
Navigate to Ultimaker Cura’s Website
To get started with Ultimaker Cura, you’ll need to go to the Ultimaker Cura website and download the software for Windows or Mac. I show you exactly how to do both in the tutorial video if you are a visual learner.
Here are the steps if you’re sticking with me here:
- Go to the Ultimaker Cura website
- At the top of the page, you will see a menu – select “Software”
- Click the button that says “Download for Free”
- Then choose your operating system
I have instructions for both Mac and Windows, so go ahead and go to the section of your choice below:
How to Download Ultimaker Cura for Mac
- Click on the Mac operating system installer, and the file will download to your computer
- Double-click on the DMG file on your desktop
- Agree to the terms and conditions
- A drag-and-drop prompt screen will appear. Click and drag the Cura icon onto your applications folder
- Close the window
- The installer boot will be on your desktop. Go ahead and drag that to the trash
- Go to your applications folder and drag Cura to your dock
- Now we are ready to open it!
How to Download Ultimaker Cura for Windows
- Click on the Windows operating system installer, and the file will download to your computer
- Double-click on the downloaded file on your desktop to start the installation
- Agree to the terms and conditions
- On the prompt window, select the directory where you want Cura to be installed (note: you need at least 1.3 GB of space)
- A “Choose Start Menu Folder” prompt will appear – leave it alone and go directly to “Install”
- After Cura is installed, a prompt will appear – make sure the “Run Ultimaker Cura” box is checked
- Click “Finish” to load the program
- You may get a firewall prompt that appears click on “Allow Access”
- Now we are ready to open it!
Agreeing to User Agreement and What’s New Page
Once you’ve downloaded the software, you’ll need to agree to the user agreement before setting it up for your specific printer. If you don’t agree to the terms, you cannot use Cura. So make sure you click that little check box and be on your way.
Then go check out the What’s New page so you can stay up to date with all of the updates that Cura makes to the software. Some updates are game-changers, so always take a quick peek at those updates so you are always in the know!
Setting up Cura for your 3D printer
Adding a Printer
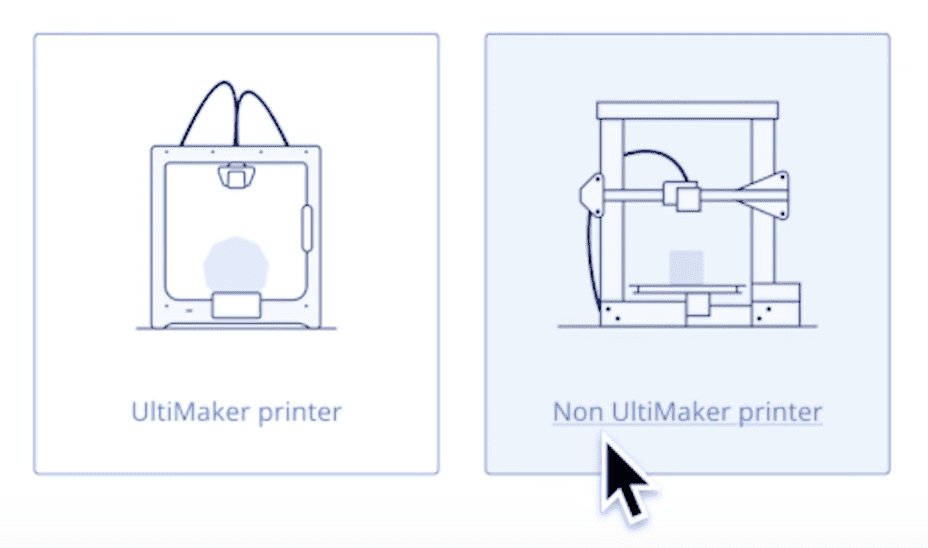
To set up Cura for your 3D printer, you’ll need to add your printer to the software and fill out the machine settings page. This will allow you to configure the software to work with your specific printer.
You will have the option to choose either an Ultimaker printer or a non-Ultimaker printer.
For this tutorial, I have a non-Ultimaker printer and will be setting up my Creality3D Ender 3 Pro.
Adding a Non-Networked Printer
The printer set-up page will ask if you have a networked or non-networked printer.
Most who find this article are likely not using a networked printer, so we will set up a non-networked printer for this tutorial. For reference, I am setting up my Creality Ender 3 Pro.
Then you will see a list of manufacturers. Find your printer and add it.
You can also rename your printer if you wish to do so.
Filling Out the Machine Settings Page
Once you add your printer, you will need to verify all your settings to ensure the slicer will print properly.

Start on the “Printer” tab of the settings. If you found your printer on the list of printers that Cura has presets for, I highly recommend sticking to those settings and not changing anything.
Overview of the Cura Interface and Workspace
It’s completely understandable to be confused by Ultimaker Cura as a beginner. There are so many features, settings, and options to choose from and it can be overwhelming. But don’t worry. I’m here to teach you the basics so you can learn the foundations and successfully print your very first 3D print. All you need is a little patience and practice, and you can master this software.
Here is the Cura workspace overview in the video tutorial
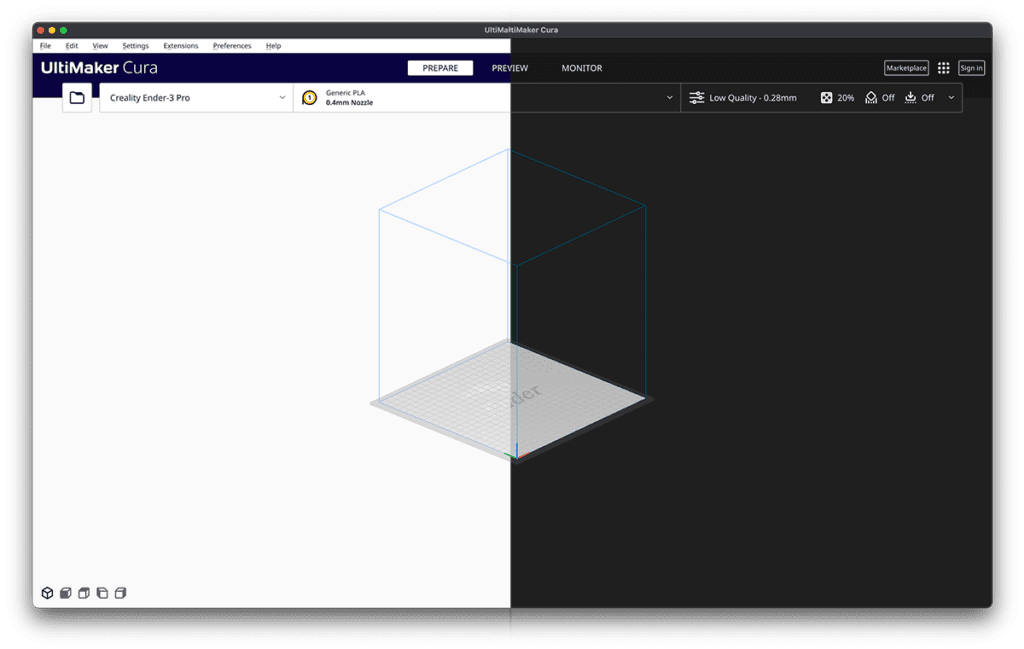
Understanding the Print Bed and Build Volume
Before you start preparing your 3D model for printing, it is essential to understand the size of your printer’s build volume. The build volume refers to the maximum size of the 3D model that can be printed on your printer. You can find the build volume specifications for your printer in the printer’s manual or on the manufacturer’s website.
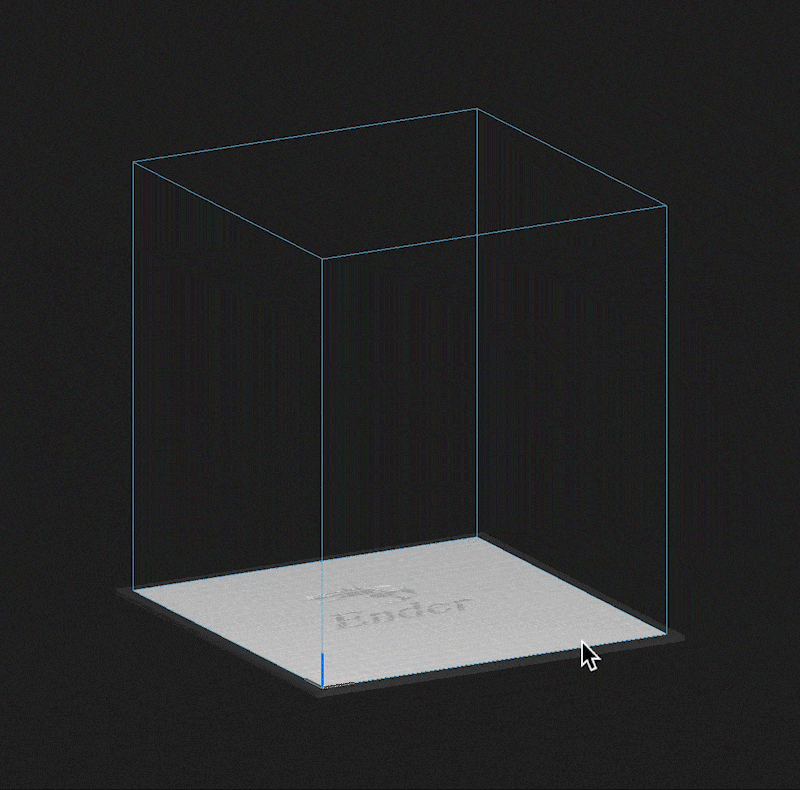
Once you know your printer’s build volume, you can adjust the size of your 3D model to fit within the available space. You can do this by using the scaling tool in Cura to resize your model.
How to Open a File
To get started with Cura, you will need to open a 3D model file. Cura supports a range of different file types, including STL, OBJ, and 3MF.
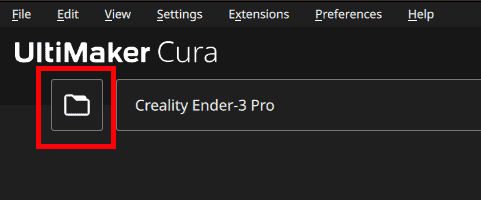
To open a file in Cura, simply click on the “Open File” button in the top left corner of the screen. This will open up a file explorer window where you can browse for and select the file that you want to print.
Setting Your Print Material and Nozzle Size
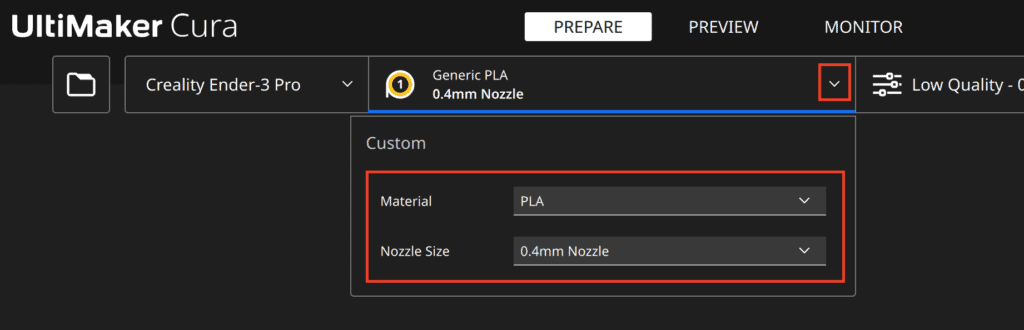
The material setting is to set the type of material or filament you want to print. I use Inland PLA, so I always choose the “Generic” PLA setting for my prints, which come out beautifully.
As for the nozzle size, most printers on the market come stock with a 0.4 mm nozzle. However, I always recommend double-checking the specification for your 3D printer to make sure the nozzle size is accurate.
If you select the wrong size nozzle, your 3D prints may not turn out well.
A Quick Word on Perspective Camera View
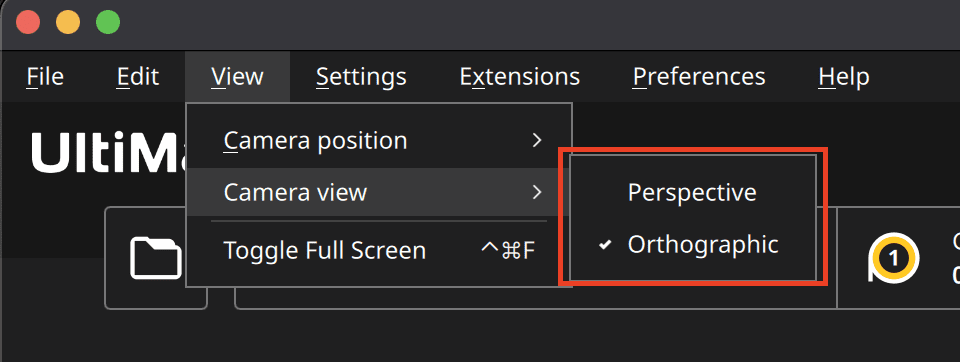
I strongly recommend you turn off your perspective camera view and change it to the orthographic one. You will be able to see your model and how it is positioned on the build plate much more accurately. If perspective is on, then you may not be able to see when things are misaligned or off of the build plate.
Resizing and Moving the 3D Model
Once you have opened your 3D model in Cura, you can resize and move it around to fit within your printer’s build volume. To do this, you can use the scaling and moving tools in the left-hand sidebar.
To resize your model, simply click on the scaling tool and drag the handles to make it larger or smaller. You can also enter specific measurements in the scale fields to resize your model precisely.
To move your model around, click the move tool and drag the model to the desired location. You can also use the arrows on the move tool to move the model in specific directions.
Rotating the Model
In addition to resizing and moving your model, you can also rotate it to get the best orientation for printing. To do this, click on the rotation tool and use the arrows to rotate your model in the desired direction.
Here is the video tutorial section where I talk about the Cura Modifier Panel and how to resize, move, and rotate your model on the build plate.
How Do I Get Dark Mode in Cura?
Change the Display Mode:
The number one question I get from my viewers when they see my Cura setup is “How do you get dark mode in Cura?”
Cura has Light and Dark mode color schemes that you can choose from to customize the software’s appearance. To change the color scheme, click on the “Preferences” button in the upper right-hand corner of the screen. Then, click “General” and select the color scheme you want for your display.
I show you how to change to dark mode in Cura in the preferences section.
Important note! You must close out and restart Cura to see the changes you made to the theme.
Types of Filament for 3D Printing
Selecting the right filament for your project is critical for getting a good print. Many types of filament are available, each with its unique properties and challenges.
Filament comes in many types, including PLA, ABS, PETG, Nylon, and many more. Each type has its own unique properties and challenges.
Each filament has its own unique challenges, such as warping, stringing, or clogging. It’s important to understand the properties of your chosen filament and adjust your print settings accordingly. Some have unique setting requirements to print successfully.
Start with PLA
If you’re new to 3D printing, or even if you’ve been at it for a while, I recommend starting with PLA filament. PLA, or Polylactic Acid, is a biodegradable thermoplastic that is easy to print, requires low printing temperatures, and produces little to no odor. Additionally, it’s widely available and affordable, making it an excellent option for beginners.
When to Test New Filaments
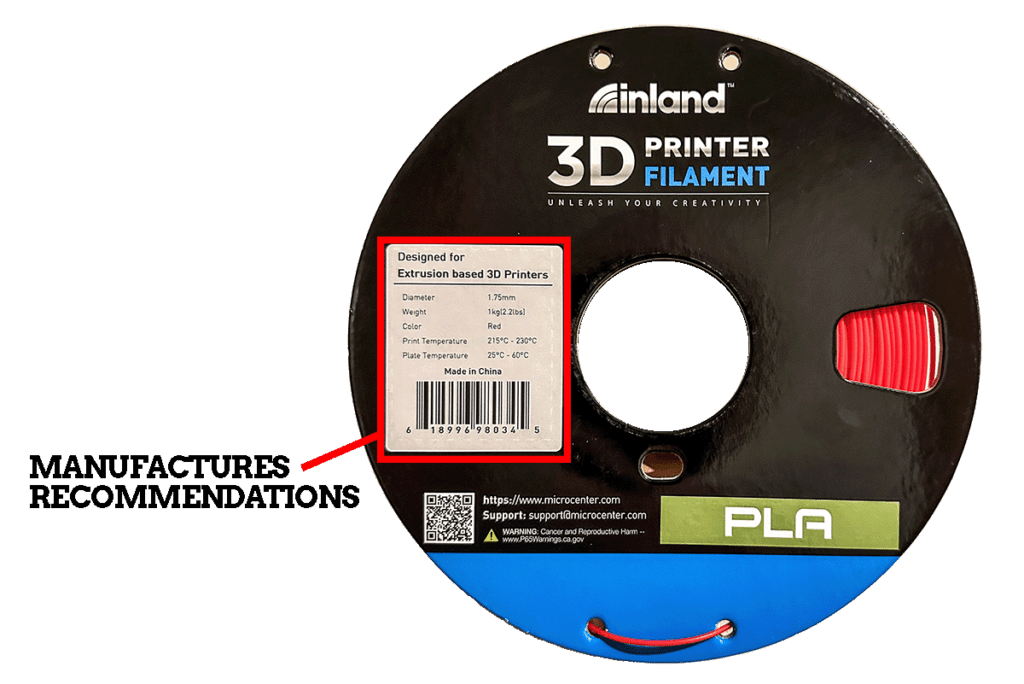
When it comes to testing new filaments, it’s essential to ensure you’re using a filament compatible with your 3D printer. Filaments come in different diameters, and some printers cannot print with certain materials. Additionally, different filaments require different printing temperatures, so it’s crucial to check the manufacturer’s recommended settings before starting a print.
Your First Prints: Basic Settings to Keep it Simple
Your First Prints
When you’re ready to start your first print with Cura, it’s best to leave everything in the default settings to keep things simple. This way, you can focus on learning the basics of 3D printing without getting bogged down with too many details. As you gain experience, you can experiment with different settings and tweak things for the best results.
Understanding The Basic Cura Settings

Cura’s Basic Settings View is an excellent place to start when you’re new to 3D printing. Here’s a quick rundown of what each of these settings means:
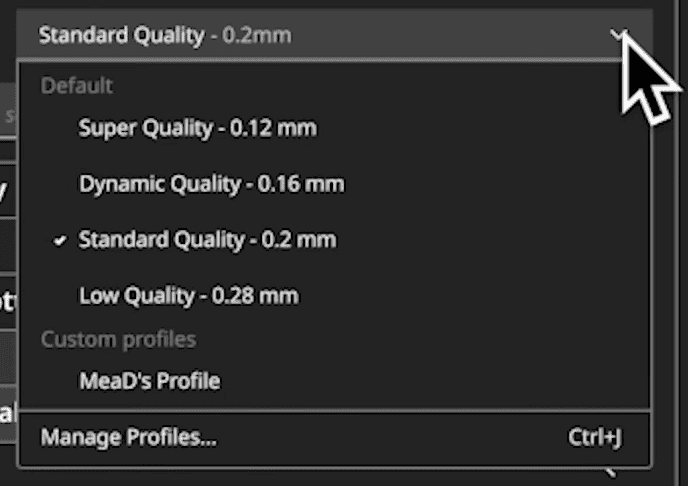
- Quality: The quality setting determines the layer height of your print. The lower the layer height, the higher the quality, but the longer the print will take.
- Infill: This setting determines how much material is used to fill the inside of your print. Higher infill percentages will strengthen your print but take longer to print.
- Shell Thickness (Wall Thickness): This setting determines the thickness of the outer walls of your print. Thicker walls will make your print stronger but will take longer to print. The shell thickness always has to be divisible by your nozzle size – I have a standard 0.4 mm nozzle.
- Support: This setting determines if your print requires support structures to hold up overhangs or other unsupported areas. Adding support structures can be helpful, but printing will take longer and require additional material.
- Build Plate Adhesion: This setting determines how well your print will stick to the build plate. Options include a skirt, brim, or raft, which are additional structures printed around your model to help it stick to the build plate.
This is the detailed overview of the basic settings panel in Cura. In the video, I show you where to find the panel and share my thoughts on keeping things simple for beginners. I also share some tips and my recommendations for settings.
What are Supports
Support structures are additional structures printed alongside your model to hold up overhangs or other unsupported areas of your 3D prints. They’re essential for ensuring that your print comes out correctly, but they can also add significant printing time and use more material.
Identifying Areas That Need Support Structures
To identify areas that need support structures, look for areas of your model that extend outward without any support underneath. These areas will typically require support structures to hold them up.
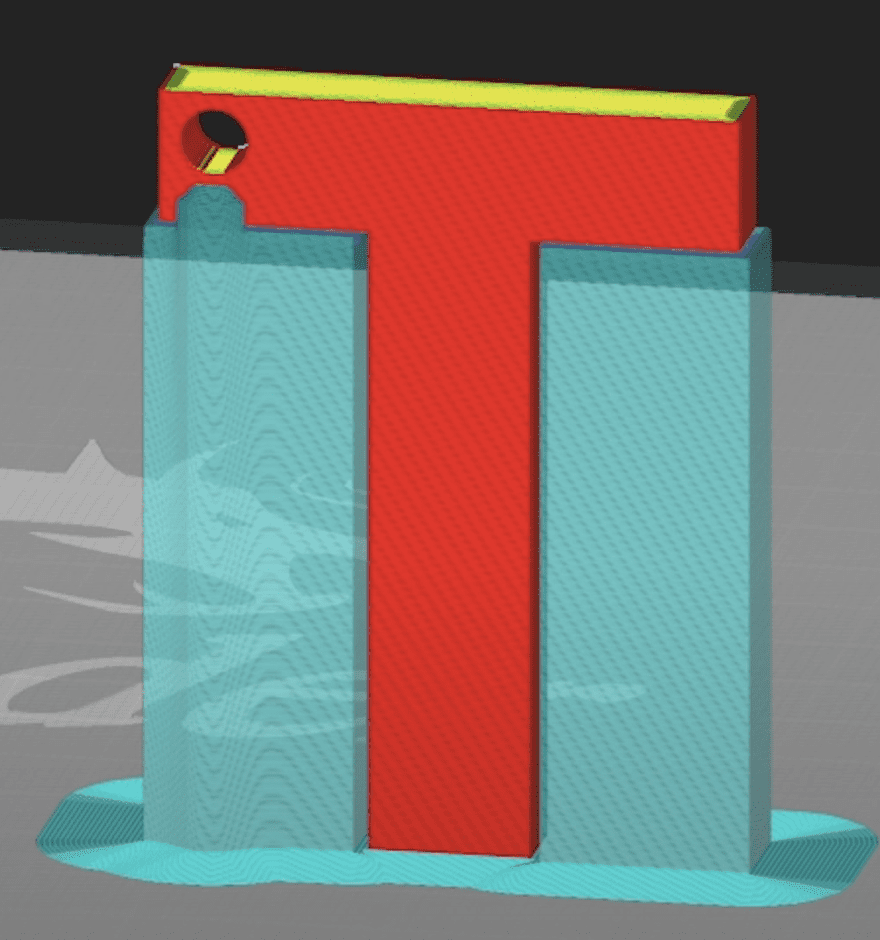
What Are Islands and How to Avoid Them
Islands are areas of your model that are not connected to the rest of the print. These areas can be challenging to print, as they require additional support structures or special print settings to ensure that they come out correctly.
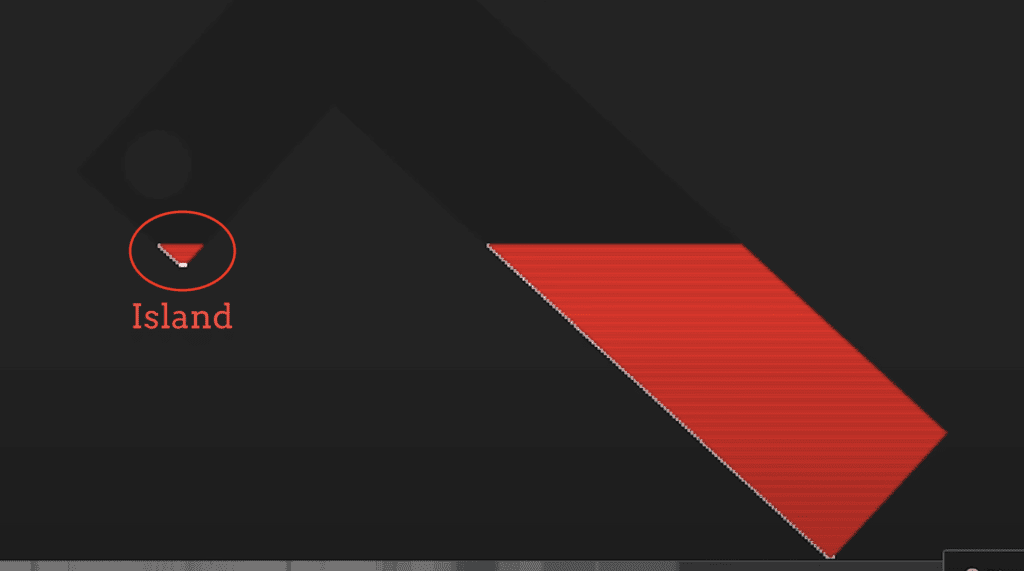
I spent a bit of time in the video showing examples of support structures and explaining when you need them and how to identify problems, like islands, before you hit print.
Preparing Your Model for Printing
Slice the Model
Once your model is imported, it’s time to slice it. Slicing is the process of turning your 3D model into printable layers. Cura’s slicing engine is fast and accurate, allowing you to slice even complex models easily. To fine-tune your print, you can adjust settings such as layer height, infill density, and support structures.

The Preview Display
After slicing your model, Cura displays a preview of your print. This allows you to see exactly how your model will be printed, layer by layer. You can rotate and zoom in on the preview to inspect specific areas of your model.
Length of Time
Cura also shows you an estimate of the print time. This is based on your chosen settings and the size of your model. Knowing the print time can help you plan your printing schedule and avoid wasting filament. Note this is a time estimate and is not always exact.
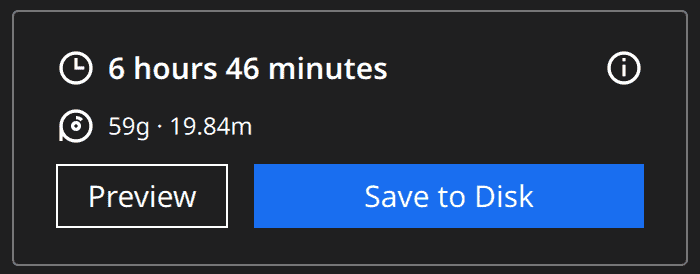
Filament Usage
Cura also estimates the amount of material, or filament, that will be used for your print. This helps ensure that you have enough filament on hand and for calculating the cost of your print.
Previewing the Model Before Printing
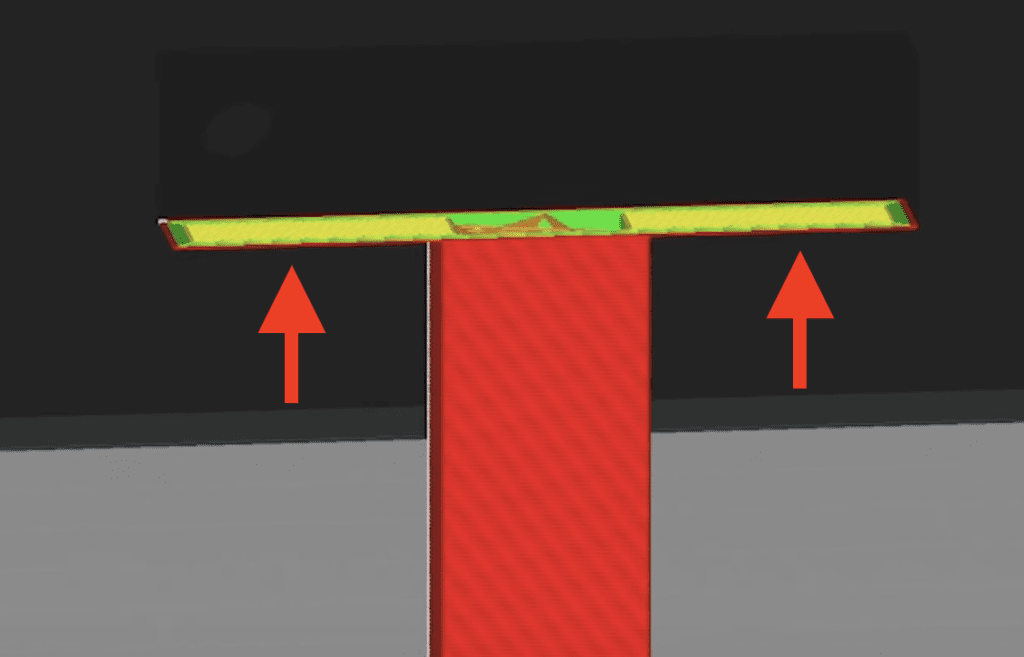
Before you start printing, previewing your model one more time is a good idea. Look for any areas that might cause problems during printing, such as overhangs or small details that might not be well-supported.
Catching Fails Before You Print
Cura’s preview also lets you catch potential print failures before printing. Look for areas where there might be too much or too little support, or where there might be issues with bed adhesion. Catching these issues early can save you time and filament.
In Cura, make sure you are scrubbing through the model to see how it is going to print. It is this step that catches potential problems because it gives you an exact representation of what the slicer is telling the 3D printer to do with the 3D model. Start with the scrubber bar at the bottom of the first layer and slowly move up.
Things to Look for:
- Check the first layer to ensure it has a lot of surface area on the print bed. Make sure you have a good skirt attached to the print.
- Then move up to the second layer and check that there aren’t any areas that are coming off of the first layer. Here’s an example of what I mean.
- Do a slow scrub to look for islands or any imperfections popping up.
If you want to know more about the causes of print failures, I did a webinar explaining all the factors that could contribute to failed prints and how to prevent them.
How to Save Your Cura Print File
Once you’re happy with your preview, it’s time to save the print file. Cura exports the file in G-code format, the language that 3D printers understand.
You can rename your file in your object list if you want to change it from the original file name. I usually change it to something more representative of my naming conventions.
Depending on your printer, there are a few ways to save your Cura file. Check to see what your 3D printer accepts before you save anything.
- Micro SD Card
- Regular SD Card
- USB Drive
- Save to Disk – the file saves to your computer

If you choose “Save to Removable Drive” and you have multiple SD cards like I do, verify that you have the correct one before hitting save.
Starting Your First Print
With your sliced file ready, it’s time to start your first print. Save to a removable device and put the SD card or USB drive in your printer.
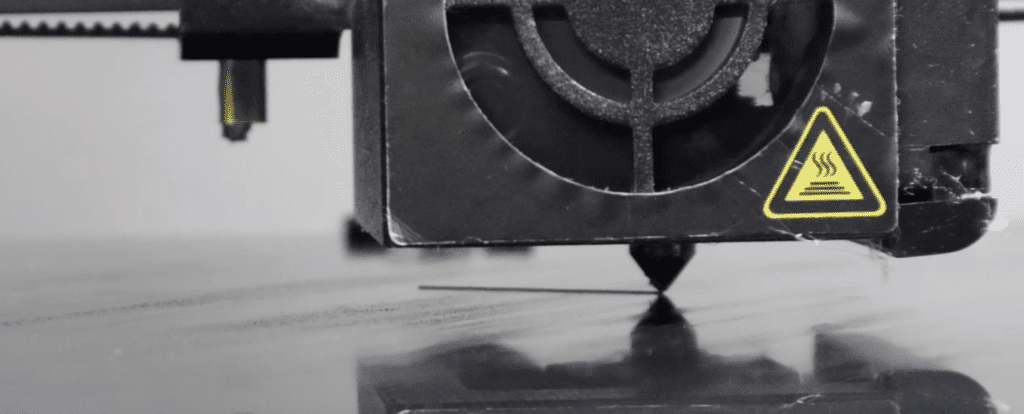
Watching the First Layer
As your print gets underway, it’s important to stay and watch the first layer closely. Don’t immediately walk away because the first layer is the most important layer, and you need to make sure it is successful. If you walk away (we’ve all done it) and the print doesn’t stick, you return to a stringy spaghetti mess. Watching the first layer can be a good indicator of how well your print will turn out. If the first layer looks good, then chances are the rest of the print will be successful.
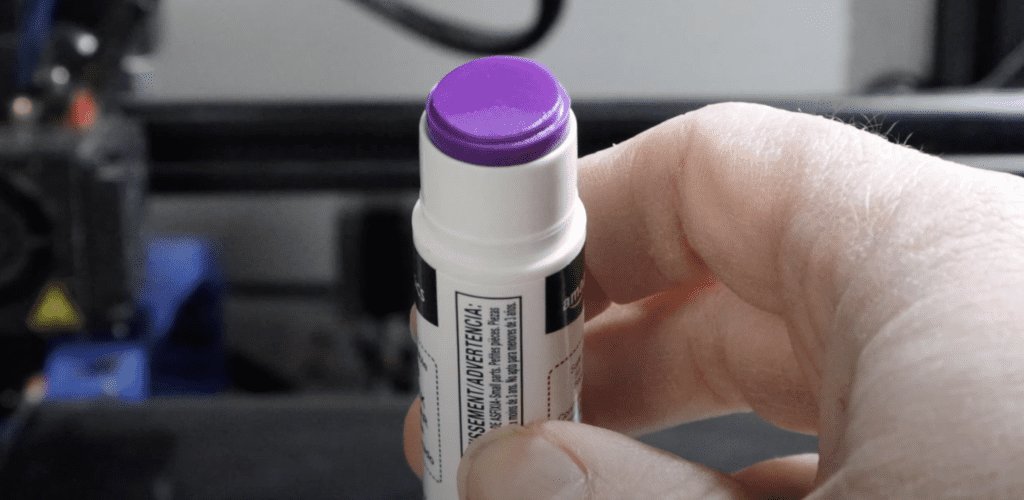
A Word on Bed Adhesion
An extra step to add security and peace of mind is adding an adhesive to my build plate – I love using purple glue sticks. Now, I get a lot of heat for this, and people ask why I use an adhesive aid when I should be able to get a good print without it. Could I get the print to stick to the bed without it? Absolutely. BUT I’m not in or around my studio much of the day, and I’m much more concerned with getting a good print. That little bit of extra adhesion gives me one more safeguard against failed prints and provides a solid foundation.
Advanced Print Settings in Cura
If you’re ready to start experimenting with more advanced settings, you can switch to Cura’s Advanced View. This view offers more control over your print settings, including options like speed, cooling, and infill patterns. However, there are a ton more settings here, so be prepared to spend some time tinkering with settings and testing prints to get the best results.
Print Profiles and Custom Settings
Print profiles are pre-configured settings that tell the printer how to print a specific object. They contain information about layer height, infill density, print speed, and more. Cura comes with various pre-set print profiles optimized for different types of 3D printers and materials. These profiles can save you time and effort in setting up your print and ensure that you get the best results possible.
Using a Pre-Set Cura Printer Profile:
To use a pre-set printer profile in Cura, you first need to add your printer to the software. This can be done by clicking on the “Add Printer” button and following the prompts. Once your printer is added, you can select a pre-set profile from the drop-down menu under “Print Settings”. Make sure to select a profile that is compatible with your printer and the filament you are using.
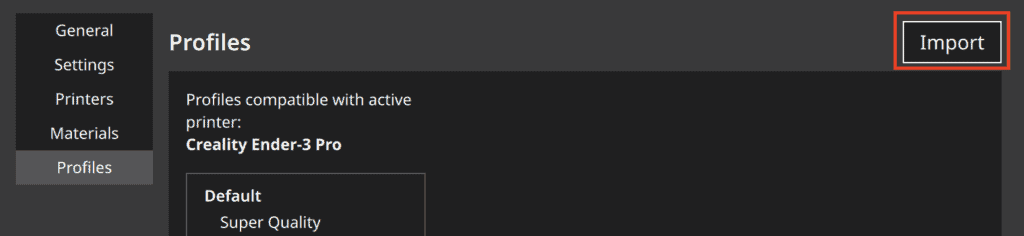
How to Import Cura Profiles:
To import a print profile in Cura, click on the “Preferences” button in the upper right-hand corner of the screen. Then, click on “Configure Cura” and select “Profiles” from the drop-down menu. You can then click on “Import” and select the profile you want to import.
How to Use Print Profiles:
To use a print profile in Cura, select it from the drop-down menu under “Print Settings.” Again, make sure to select a profile that is compatible with your printer and filament.
Creating a Custom Printer Profile in Cura:
If you cannot find a pre-set print profile that meets your needs, you can create a custom profile in Cura. To do this, go to your settings panel in the upper right-hand corner of the screen. Right at the top, you will see “Profile.” Click on the dropdown menu to see the current profile settings. If you want to change a setting and save it into a new profile, change the setting and click on the disk icon in the upper right corner of the panel to save as a new custom profile. You can name the custom print profile anything you’d like.

Conclusion
Cura is an essential tool for anyone serious about 3D printing. With its powerful slicing engine, accurate preview, and intuitive interface, Cura makes it easy to turn your 3D models into physical objects. Follow these steps to get started with Cura and take your 3D printing to the next level.
- Import your model file into Cura
- Place it on the bed in the correct spot
- Adjust your print settings
- Slice it
- Preview the model for errors
- Save to SD card
- Put SD Card in printer and hit print
- Watch that first layer!
I hope I’ve helped you get started with Cura and get started on your first 3D print. Let me know if you have any questions. I’m always happy to help!
Read: Cura Quality Settings : Layer Height and Line Width Explained
Read: Cura Build Plate Adhesion Types & Settings Guide
FAQ
Is Cura safe to install on my computer?
Ultimaker Cura is a very popular open-source software and is safe to download to your computer provided you download directly from Ultimaker’s website, which is a reputable source. Do not download Cura from any other source. Always check for the developer’s signature before downloading to ensure that the software hasn’t been modified.
What version of Cura should I use?
You should use the most recent version of Ultimaker Cura when it becomes available. Not doing so puts a user at risk of security vulnerabilities as well as missing important updates to the software.
Do I need to have an Ultimaker 3D printer to use Cura?
Cura does not require users to have an Ultimaker printer and many other models of 3D printers can be used with the slicer software.