Today, I’m turning the spotlight on Cura infill patterns and how to adjust the settings to get the best results for your 3D prints.
The infill is the unsung hero as it is the backbone of the print. The intricate designs, hidden within the heart of your print give your model its form and strength.
Whether you’re building a fortress-like structure or a feather-light figurine, your infill pattern choice holds the key.
What is Infill in 3D Printing?
Infill is the filament structure or pattern that is printed on the inside of your 3D print that gives it shape and support. The infill patterns fill the space between the outer shell and top and bottom layers of your print.
Picture it as the skeletal structure inside your 3D print that gives it its shape and strength.
Sometimes, your 3D models need a little extra help, especially when dealing with tricky overhangs or sharp inward angles. That’s where internal support structures come in, ensuring your print’s walls have something sturdy to lean on.
But what if you don’t need all that support? No problem, Cura’s got you covered – you can set the infill to make your model completely hollow.
The beauty of Cura’s infill settings lies in its flexibility, letting you conserve material and shave off precious printing time.
Let’s dive into these settings!
Infill Density
Infill density is the amount of filament used for the inside of our 3D prints and is a percentage of the total volume of the object in Cura.
The infill density can be adjusted in a 3D slicing software, and it affects both the strength and weight of the printed object.
A higher infill density will give you a stronger and more rigid print, but it will also use more filament and take longer to print.
A lower infill density will use less material and print faster, but the print will be weaker and more flexible. Just make sure you don’t set it too low, or it won’t be strong enough.
For example, if the infill density is set to 20%, then 20% of the volume of the object’s interior will be filled with infill material, while the remaining 80% will be empty space.
The infill density that you will want to use for your print depends on how strong you need the internal structure to be, the weight, and other factors, such as the shape of the object. Also, don’t forget to take into account the material being used.
Infill Line Distance
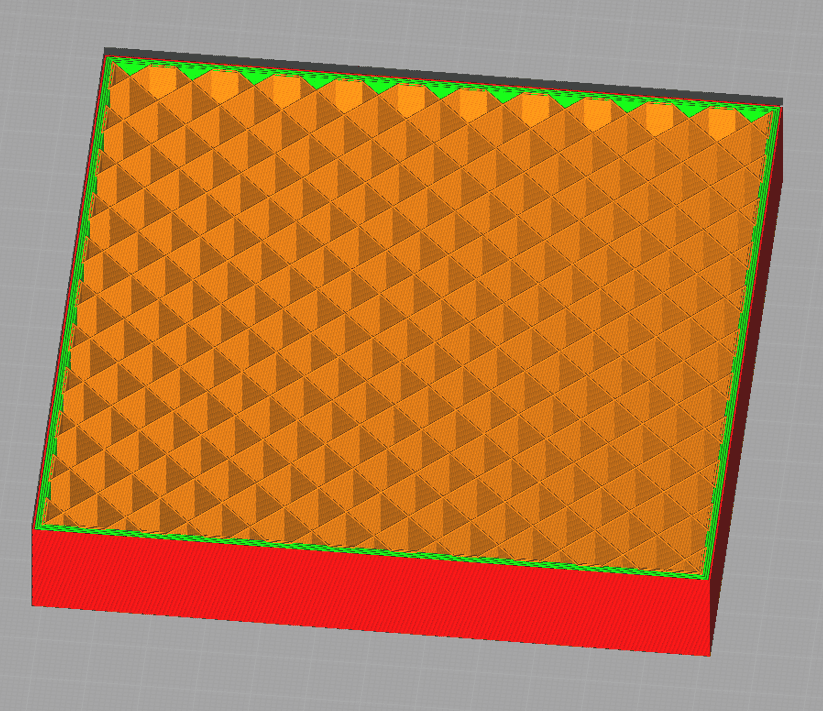
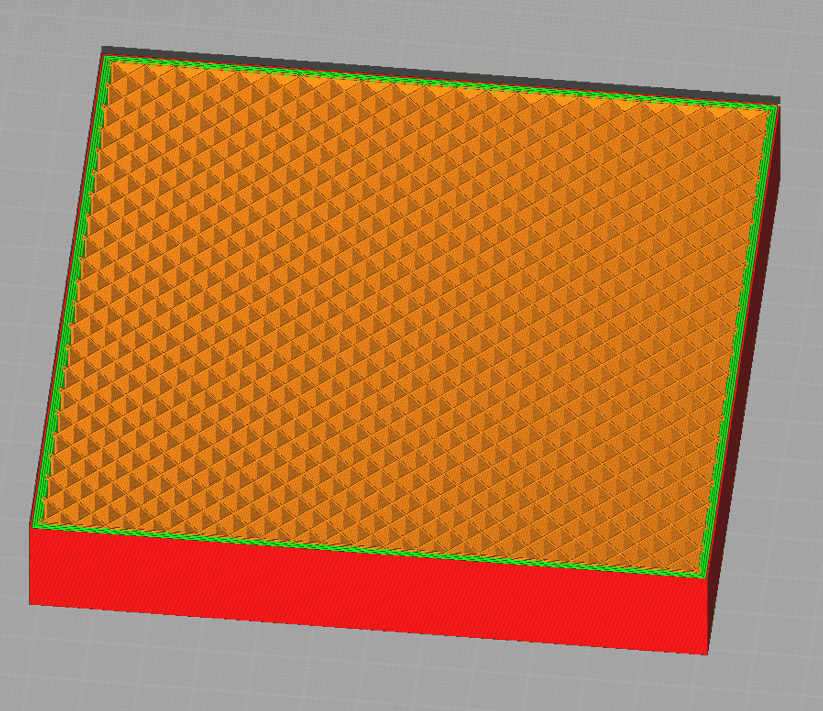
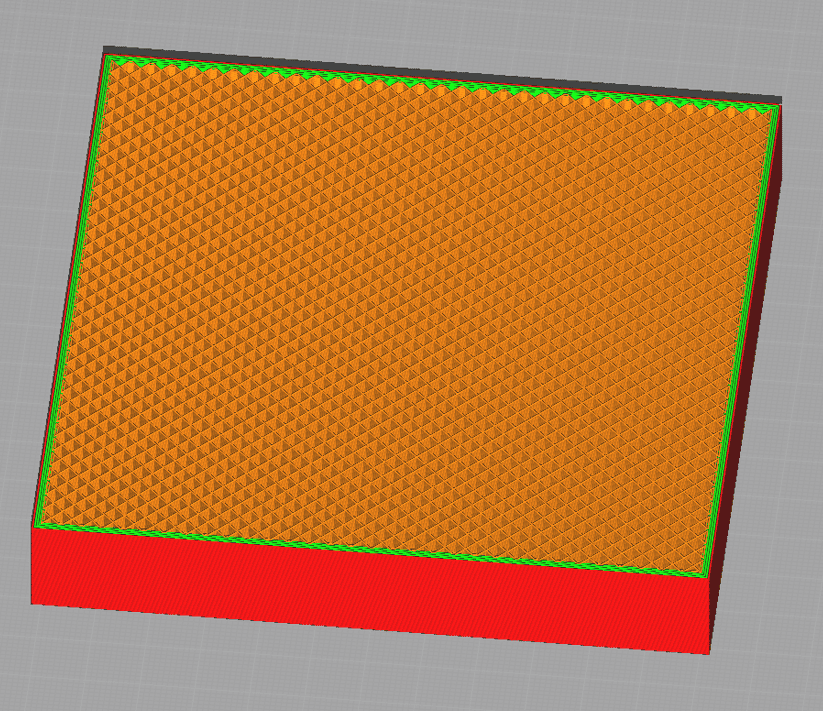
Another way you can change the infill density is by adjusting the ‘Infill Line Distance’ setting, which sets the distance between each printed infill line.
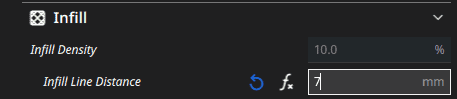
This has the same effect as changing the ‘Infill Density’ setting but is turning the unit into a set measurement of mm rather than using a percentage. When you change this setting, it will make the ‘Infill Density” setting gray out and it will be unavailable to edit.
The distance between each line affects the amount of material used and the strength of the print. A smaller distance between infill lines will use more filament and create a denser infill, resulting in a stronger print. A larger distance between infill lines will use less filament and create a less dense infill, resulting in a lighter but weaker print.
What is a Good Infill Density?
Deciding on how to set your infill density will come with experience and practice. It also depends heavily on your project and uses of the final print.
Prototype Prints
If you need a really strong prototype, then you will want to use a higher infill density of 90-100% (nearly or completely solid) to get the strongest print possible. Just keep in mind that printing at a higher density of infill will skyrocket your print time.
If you are prototyping, my recommendation is to do small test prints at a lower infill density first. Once you’ve got your design perfect, then you can crank up the infill density from there.
Average Prints
However, if you’re like me and not super worried about the strength of your prints, then a lower infill density will work just fine. I usually stay somewhere in the range of 5-15% infill density for most of my prints. Now, keep in mind you have to be sure you are using the correct number of top layers if the print has a larger surface area.
Cura Infill Patterns Explained
Infill patterns are the patterns of material that are printed inside of our 3D models to give them support and structure. Ultimaker Cura and other slicing software offer many different types of infill patterns that you can choose depending on your needs for your print. We are just going to discuss infill patterns available in Cura.
There are several infill categories that we must understand before we choose the infill pattern for our project. Let’s take a look.
Strong 2D Infill Patterns:
A strong two-dimensional infill pattern prints straight lines in one direction and then switches direction on the next layer as a criss-cross or grid pattern. This one is a great choice for most 3D models that require strength and stability.
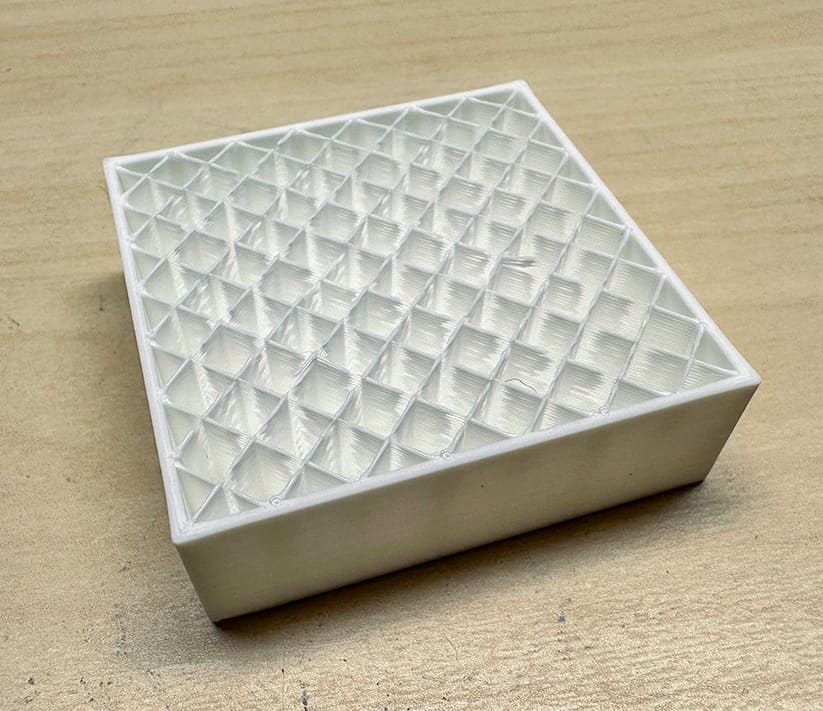
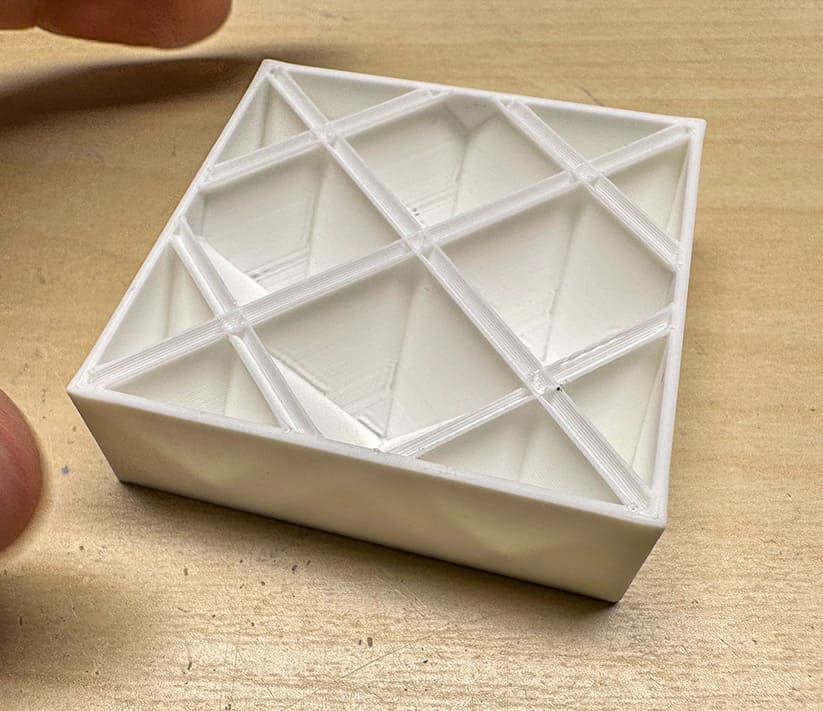
- Grid Pattern
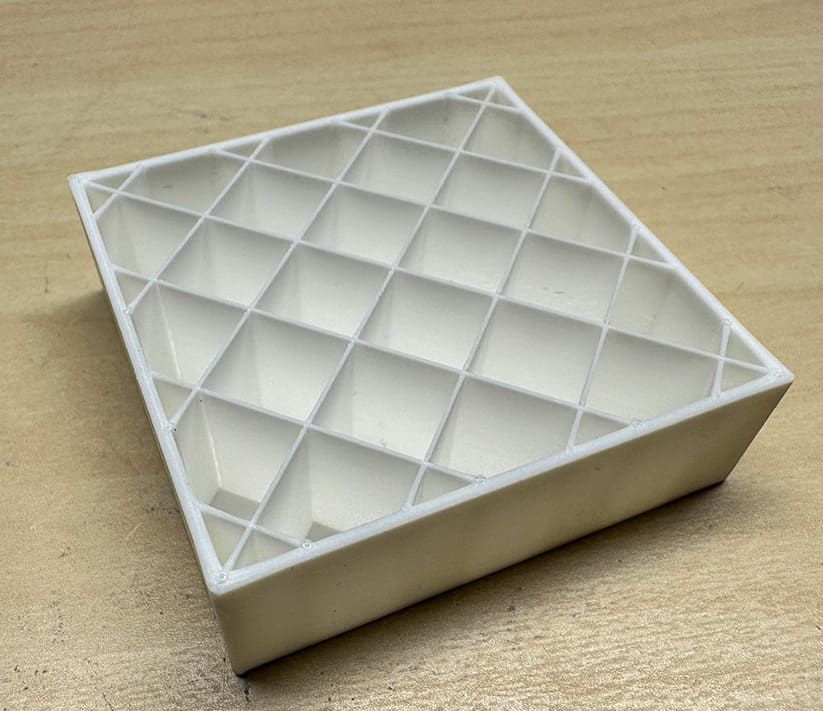
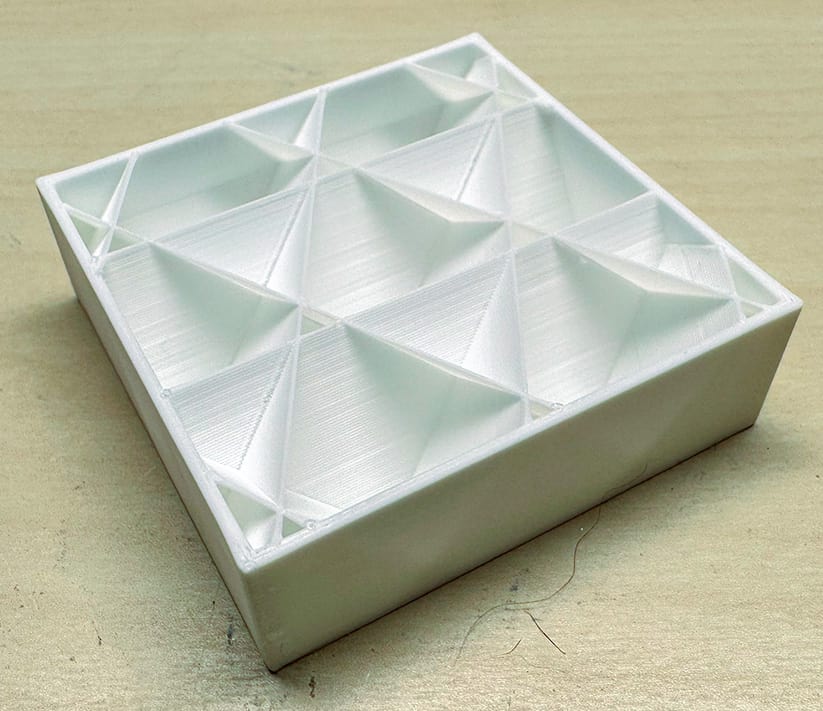
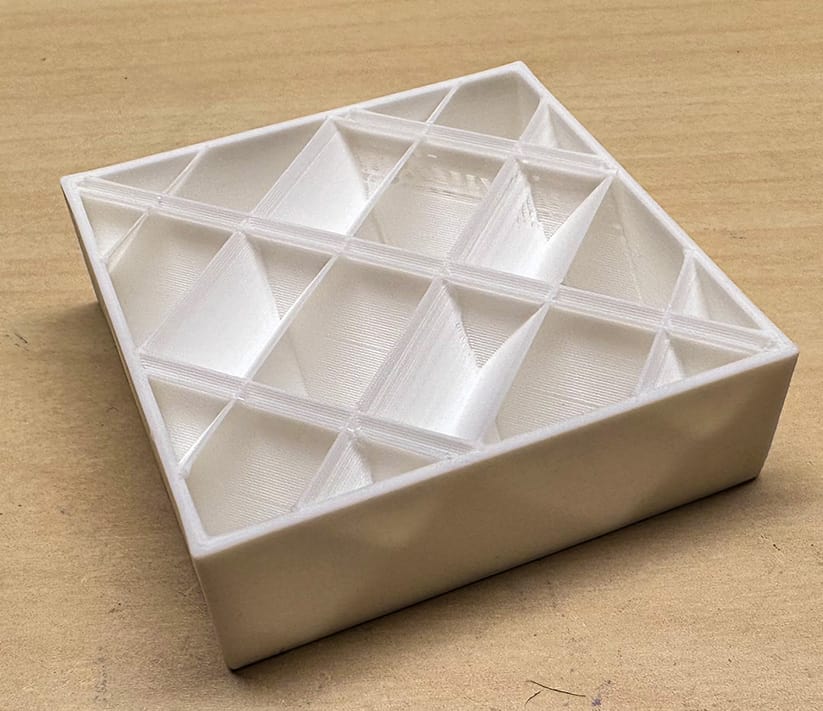
- Triangles Pattern
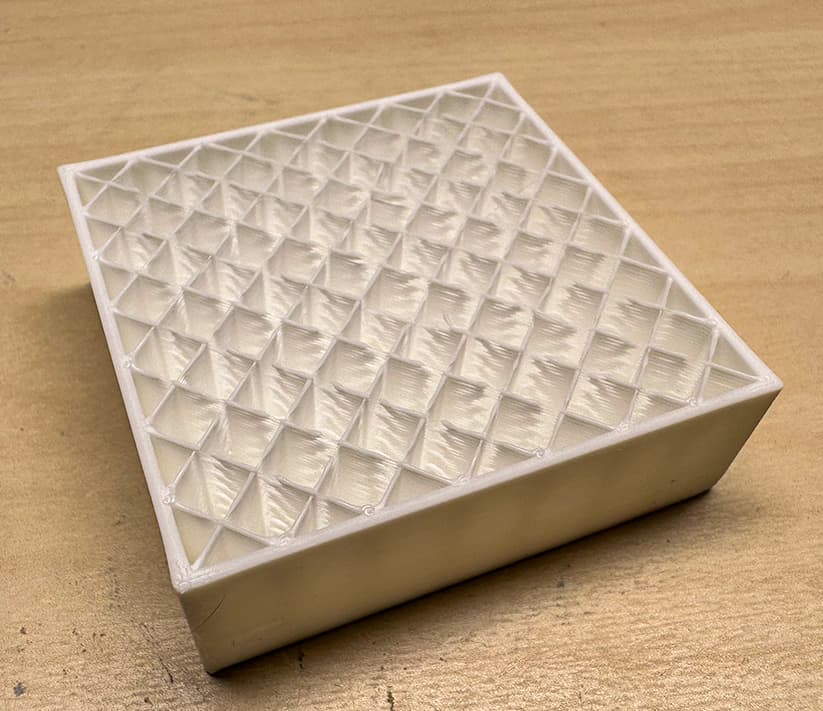
- Tri-Hexagon Pattern
I like to use this type of infill pattern when I am printing something like a flexible (flexi) model.
Quick 2D Infill Patterns:
A quick two-dimensional infill pattern is similar to a strong 2D infill as it prints in straight lines. However, the lines of filament are spaced farther apart, which means it prints faster. It’s a good choice if you need some internal support structure and aren’t worried about strength.
- Lines Pattern
- Zig-Zag Pattern
Strong 3D Infill Patterns:
The three-dimensional infill pattern is similar to the 2D infill, but it includes additional layers printed at different angles to create a more evenly distributed infill that provides strength in all directions.
- Cubic Pattern
- Cubic Subdivision Pattern
- Octet Pattern
- Quarter Cubic Pattern
- Gyroid Pattern
Flexible Infill Patterns:
Flexible infill patterns are great to use with flexible filament for prints that need to bend and flex and not be rigid. There are 2D and 3D infill options to choose from.
- 2D Cross Pattern
- 3D Cross Pattern
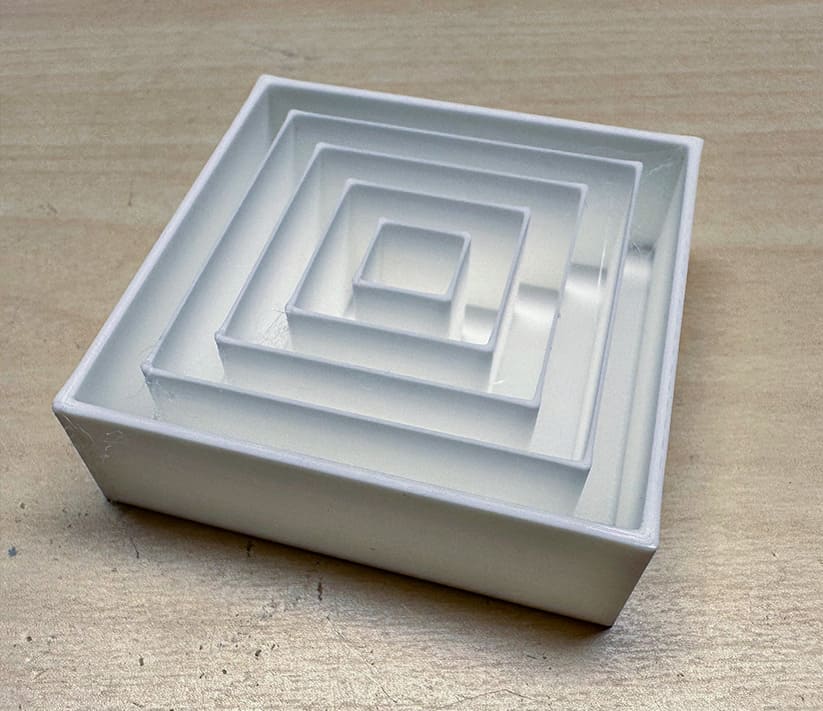
- Concentric Pattern
How to Choose the Best Cura Infill Pattern
Choosing the best Cura infill pattern doesn’t have to be as daunting as it sounds.
First, let’s remember that there’s no one-size-fits-all answer here because the “best” infill pattern truly depends on your project needs.
You need to consider variables such as strength, flexibility, weight, and printing time.
Are you looking for strength? According to this study on the strength of 2D and 3D infill patterns, you might want to consider the “Grid” or “Triangles” patterns. But if your model needs to be lightweight, you’ll be better off with “Lines” or “Zig-Zag”.
Remember, you’re not stuck with one pattern forever – feel free to experiment and find what works best for your specific prints.
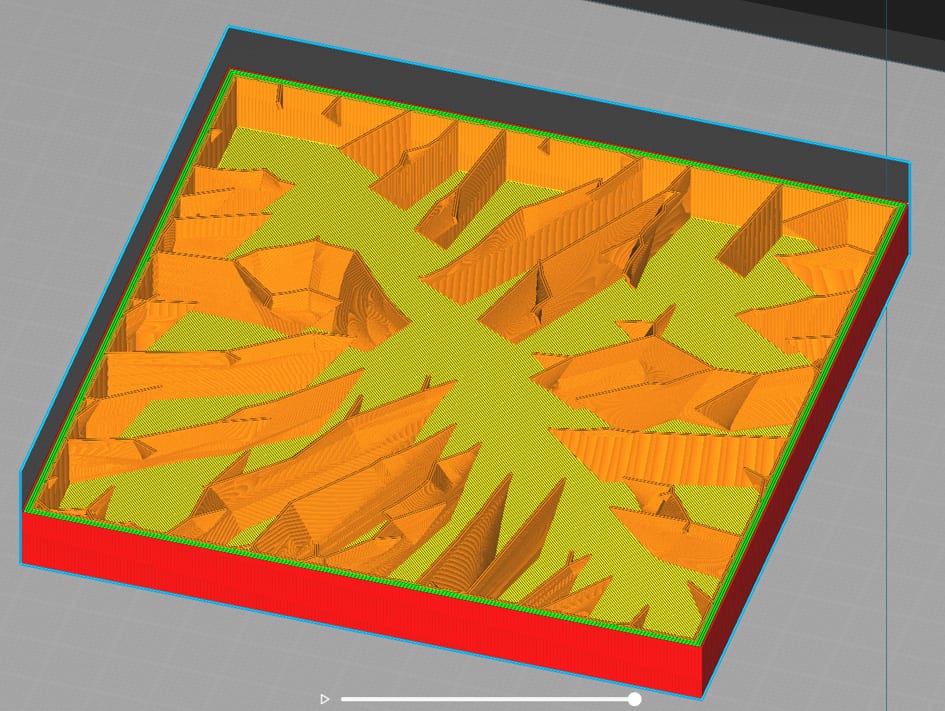
And don’t forget, Cura offers a helpful preview mode that lets you visualize your infill before printing. So don’t be afraid to dive in and try out different options.
Infill Patterns in Cura
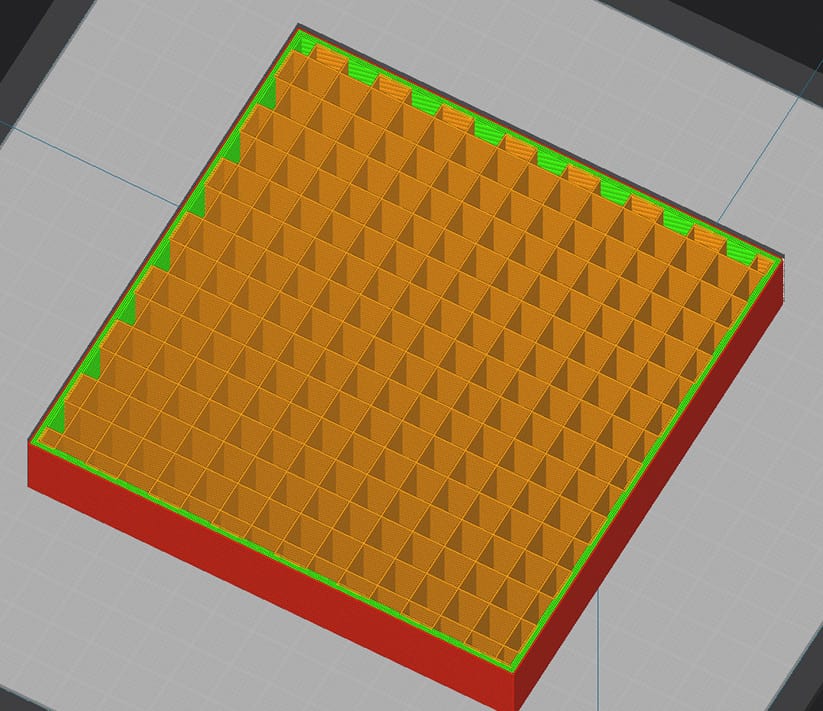
Grid Infill Pattern:
This pattern consists of straight lines printed in a criss-cross pattern, similar to a grid. It’s a strong 2D infill pattern that provides good strength and stability.
Lines Infill Pattern:
This pattern is similar to the grid pattern as it consists of straight lines, but the lines are spaced farther apart and printed more quickly. It’s a quick 2D infill pattern that is weaker than the grid pattern.
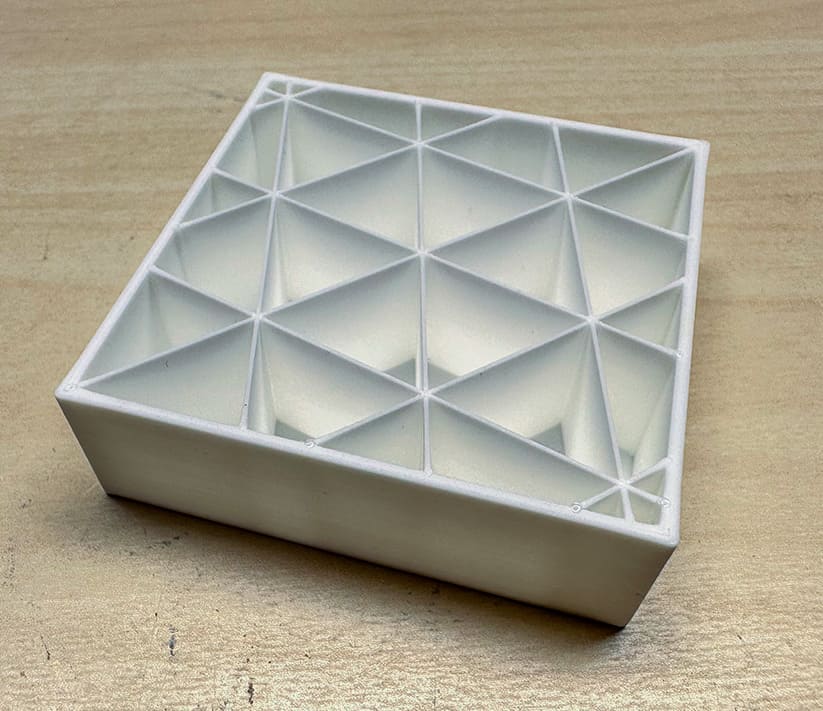
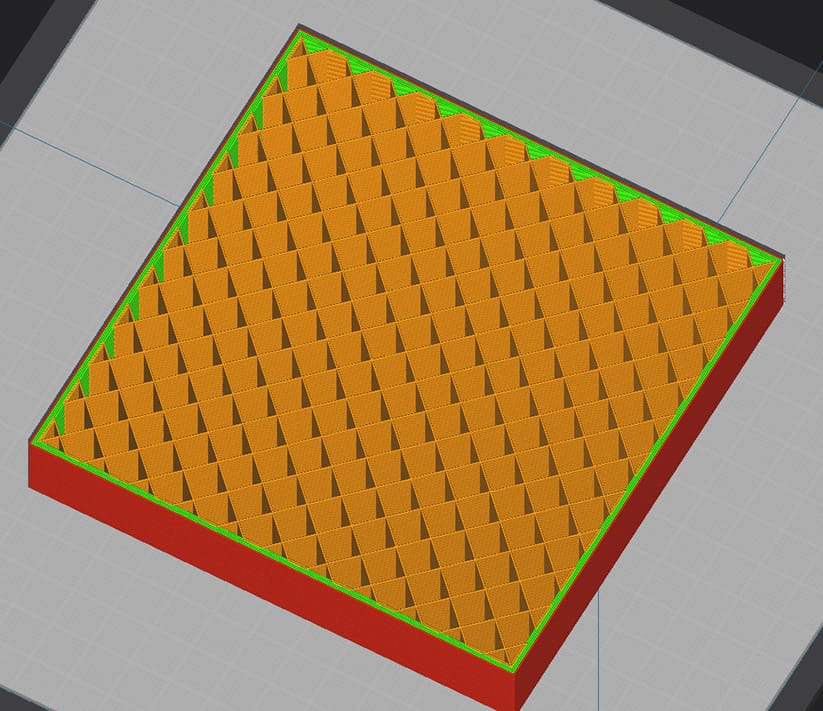
Triangles Infill Pattern:
This pattern consists of triangles printed in a diagonal pattern. It’s a strong 2D infill pattern that provides good strength and stability.
Tri-Hexagon Infill Pattern:
This pattern consists of triangles and hexagons printed in a diagonal pattern. It’s a strong 2D infill pattern that provides good strength and stability.

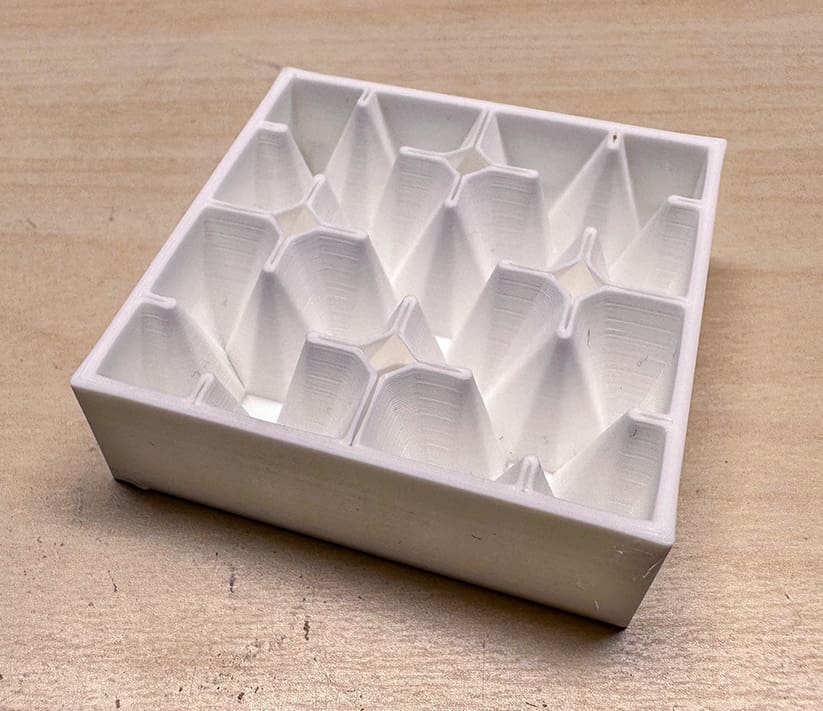
Cubic Infill Pattern:
This pattern consists of cubic shapes printed in a diagonal pattern. It’s a strong 3D infill pattern that provides strength in all directions.
Cubic Subdivision Infill Pattern:
This pattern is similar to the cubic pattern, but it uses less material. It’s a strong 3D infill pattern that saves material compared to the cubic pattern.
Quarter Cubic Infill Pattern:
This is a strong 3D infill pattern consisting of a quarter cubic lattice structure.
Concentric Infill Pattern:
This is a flexible 3D infill pattern consisting of a series of circular patterns printed on top of each other, creating a spiral-like effect. It’s a good choice for flexible materials, as it creates a more flexible and elastic print.
Zig-Zag Infill Pattern:
This is a grid-shaped infill pattern consisting of diagonal lines printed continuously in one direction.
Cross Infill Pattern:
This is a flexible 3D infill pattern consisting of intersecting lines printed in a criss-cross pattern.
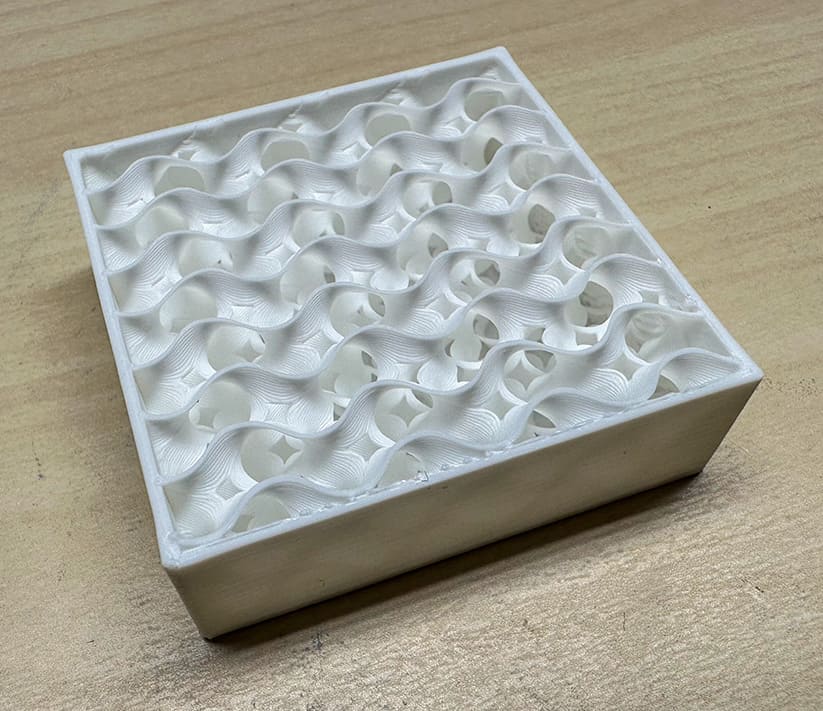
Cross 3D Infill Pattern:
This is a flexible 3D infill pattern consisting of intersecting lines printed in a criss-cross pattern with added complexity for increased strength.
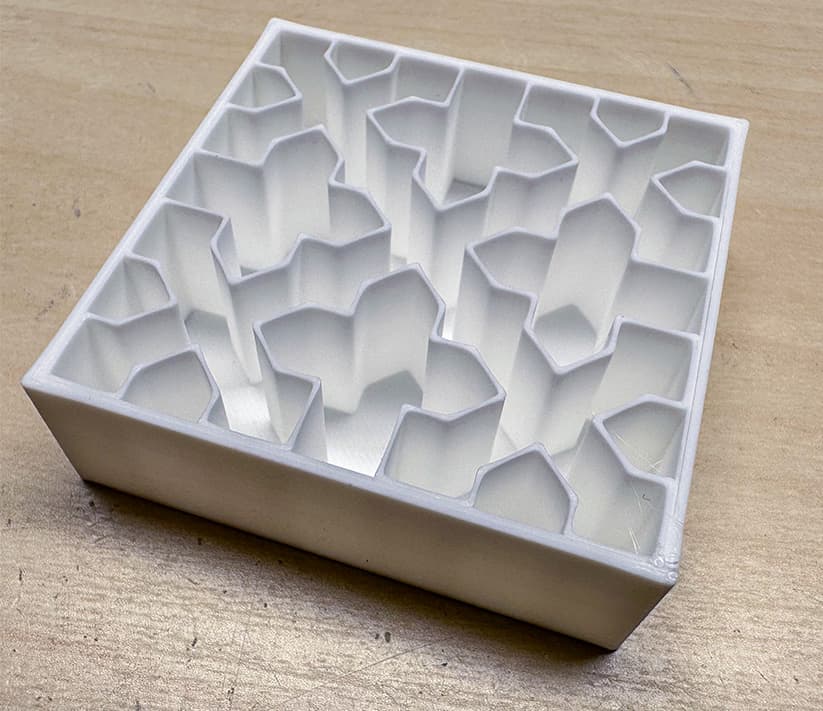
Gyroid Infill Pattern:
This is an infill pattern with increased strength for the lowest weight, consisting of a complex pattern that looks like a sponge or coral.
Lightning Infill Pattern:
Lightning infill is a newer infill pattern option available in Ultimaker Cura, and it’s definitely one of my favorite infills. It is designed to be extremely fast to print while still providing support to the top surfaces of a print.
In the lightning infill pattern, the printer creates a series of thin, horizontally aligned lines that run parallel to the top surface of the print. These lines provide support to the top layers of the print while using minimal material and printing quickly.
Because the lightning infill pattern only supports the top surfaces of a print, it’s not suitable for prints with overhangs or complex shapes that require support throughout the object. However, it can be a good option for prints that have flat or slightly curved top surfaces that need support but don’t require a dense infill structure.
Connect Infill Lines
The “Connect Infill Lines” setting in Cura tells the 3D printer to extrude filament in continuous lines for infill instead of breaking them up into individual segments. This can improve the strength and stability of the infill by creating a more solid structure, and it reduces the appearance of layer lines. However, enabling this setting may increase your print time and material usage slightly.
When “Connect Infill Lines” is disabled, Cura will print infill segments individually, and you may end up with small gaps or spaces between the segments, weakening the overall structure of the print.
Infill Line Directions
By default, the infill lines are printed at a 45° angle to the X and Y axes. The reason for this is the 45° angle allows both the X and Y motors on the 3D printer to work together to cover more area, which can improve print quality and speed.
However, you may have 3D prints that you need to change the direction of the infill lines to get better structure and stability. This is especially helpful when you are prototyping.
For example, if you’re printing a model that has thin walls or intricate details, printing the infill lines at a 90° angle to the X and Y axes (horizontal) can provide more support and structure.
Another example is if you’re printing a tall, narrow object, printing the infill lines vertically (0°) can help prevent the object from falling over during the printing process.
In Ultimaker Cura, you can adjust the direction of the infill lines by changing the degree of the X,Y angles inside the brackets of the “Infill Line Directions” setting.
I recommend setting the [X,Y] values (angles) the same so that the infill prints as intended, but feel free to play around with it inside Cura to see what this setting does.
Infill XY Offset
In Cura, infill patterns are centered by default to your 3D model. However, in some cases, you may want to adjust or offset the position of the infill pattern to better suit your needs.
To move the infill pattern to the left, right, top, or bottom, you can use the X or Y offset setting to do so.
To use the X or Y offset, simply enter a positive or negative value in the “Infill X Offset” or “Infill Y Offset” in the software. A positive value will move the infill pattern up and to the right, while a negative value will move it down and to the left.
It’s important to note that the X and Y offset feature does not work for concentric infill types. Concentric infill patterns are designed to be centered on the model and cannot be shifted.
Randomize Infill Start
The “Randomize Infill Start” is a checkbox option in Cura that tells the software to randomly start each layer of infill in a different location.
By doing this, it prevents the infill from becoming too consistent, which could make the print weaker in certain areas. Instead, the random start points distribute the load across the infill more evenly, resulting in a stronger print.
However, enabling a randomized start position for the infill also increases the number of travel moves the printer makes, which may lead to a longer print time.
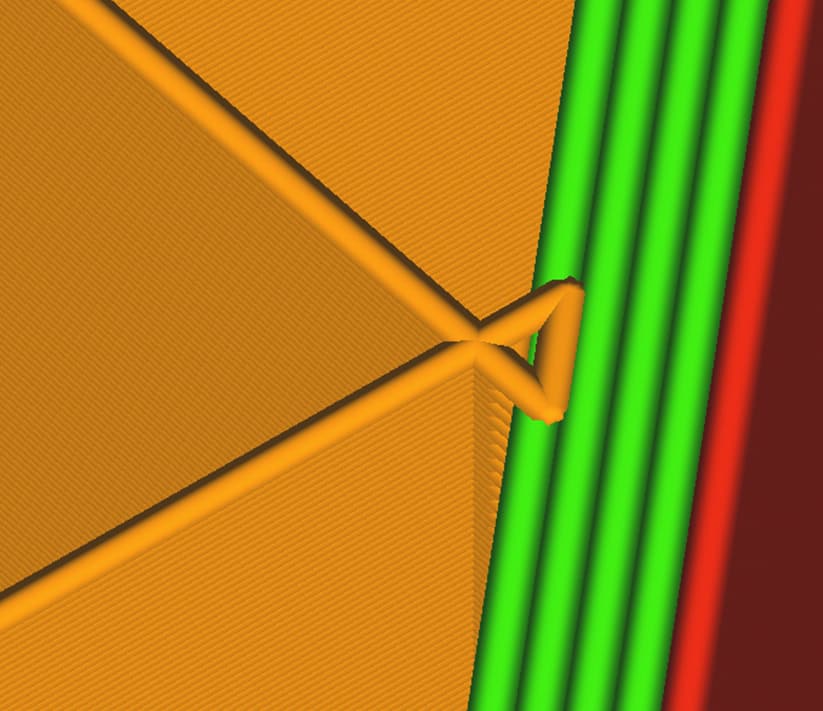
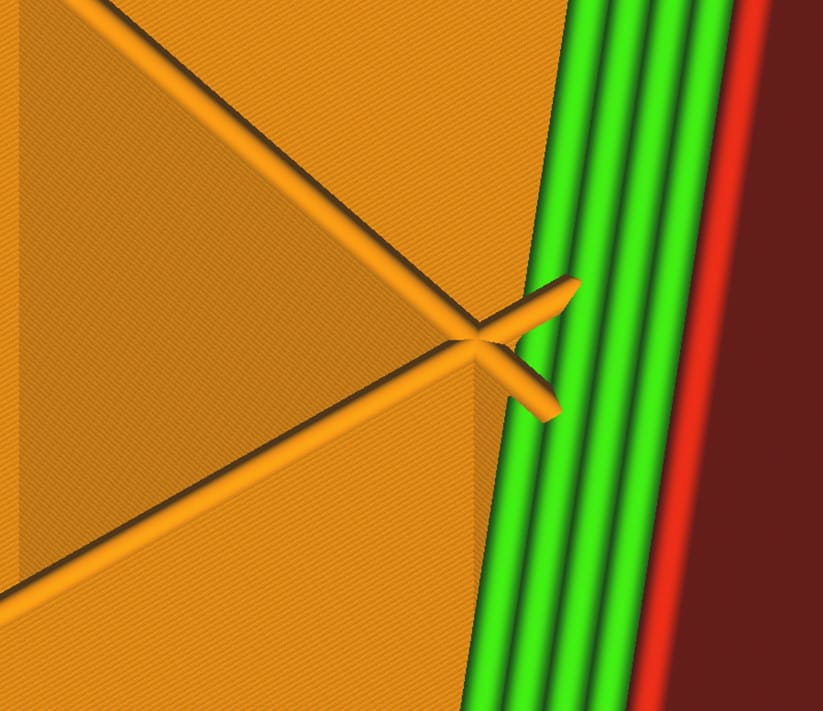
Infill Line Multiplier
The “Infill Line Multiplier” setting allows you to create a much stronger print. It converts each infill line into multiple lines that do not cross over each other – they actually avoid crossing over.
By default, this setting is set to 1 line. I like to increase this infill line count to multiply the number of lines printed for each line of infill. This increases the strength of the infill like crazy, but it will increase the print time and the amount of material used for the project.
Connect Infill Polygons
The “Connect Infill Polygons” is a checkbox setting in Cura that tells the printer to join or connect the infill lines. Infill patterns can consist of multiple closed polygons.
Without this setting enabled, the printer will print one polygon at a time, which will take much longer to print. When you enable this setting, the printer will connect these polygons to form a single continuous extrusion path for the infill without the need for retractions or travel moves between them.
One thing I want to mention is if you are using the “Infill Line Multiplier,” you will want to also make sure that you enable this setting and it will speed up the print process a bit.
*Note: This setting will appear only when the “Extra Infill Wall Count” input is 2 or more.
Extra Infill Wall Count
The “Extra Infill Wall Count” setting creates infill walls that adhere better to the outer walls of your print.
This setting is super helpful for the very top layers of your models. It will help prevent the top layers from sagging or having gaps by having those extra walls for your top layers to print onto when there are gaps in the infill. This is especially true if you use a low infill density. But, again, this option will use more material and add print time.
Infill Overlap Percentage
The bond between your infill and your walls is vitally important because if you have separation of the layers, that can actually weaken the strength of your 3D prints.
One way to strengthen the bond is to adjust the “Infill Overlap Percentage” setting between the infill and walls. It is the overlap of the infill into the wall. In Ultimaker Cura, this setting can be adjusted as a percentage or a true value.
A higher overlap value typically results in better bonding between the infill and walls. However, if the value is set too high, it can lead to over-extrusion, which can negatively affect the quality of the print. Over-extrusion occurs when the printer pushes out too much material, resulting in uneven or blobby layers.
The default overlap value in Cura is set at 30% and is usually good enough for most prints. However, if you’re experiencing issues with layer adhesion, you can try increasing the overlap value slightly but I don’t recommend going over 50%. The ideal overlap value may vary depending on the material you use, your printer settings, and the design of the object being printed.
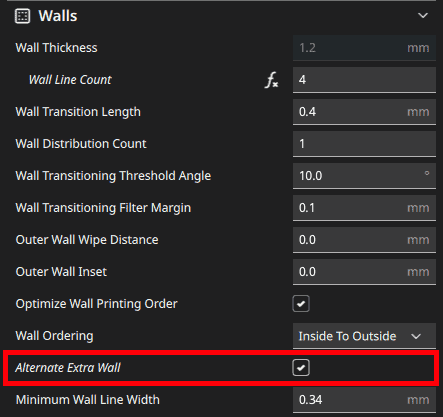
Alternate Extra Wall
If you need to improve the bond between the wall and infill, another setting to use is the “Alternate Extra Wall” setting in the wall settings. This setting prints every other layer as an extra wall, which allows the print to have more strength by interlocking with the infill and weaving into the wall every other layer. This results in a strong and integrated bond between the wall and the infill.
Infill Wipe Distance
In addition to the overlap setting, Cura also allows you to adjust the wipe distance. The “Infill Wipe Distance” is a setting that determines the distance the printer will travel over the print to clear any excess material from the nozzle before moving on to the next layer. The distance can be set in millimeters or as a percentage of the nozzle size and by default, is set to zero.
A longer wipe distance alleviates the pressure on the nozzle before moving on to the walls and can help prevent over-extrusion and common problems like stringing, blobs, zits, or a rough surface of the print. This setting does slow down the print to accommodate for the pauses.
Keep in mind that setting the infill wipe distance too high can cause under-extrusion in the infill, leading to weak spots in the print. So you may need to experiment to find a balance between preventing either over-extrusion or under-extrusion for the ideal wipe distance.
Personally, I like to just keep this setting at zero because the other settings mostly affect the strength of the print and not so much the visual quality of the outside of the 3D print.
Infill Layer Thickness
“Infill Layer Thickness” is a setting in Cura that determines the thickness of the layers used in the infill of your 3D print. Unlike the layer height for the outer walls and top and bottom layers, the layer height for the infill is not critical for visual quality. This means that you can increase the infill layer thickness to reduce the printing time without compromising the quality of the printed object.
However, it is important to note that the infill layer thickness should always be a multiple of the layer height – we set this back in the quality settings.
Read: Cura Quality Settings : Layer Height and Line Width Explained
This is because if the infill layer thickness is not a multiple of the layer height, Cura will automatically round it up to the nearest multiple. For example, if the layer height is set to 0.1 mm and the infill layer thickness is set to 0.15 mm, Cura will round the infill layer thickness up to 0.2 mm, which may not be the desired outcome.
When the infill layer thickness is set, the printer will first print the outer walls and top and bottom layers for a specified number of layers, and then it will print the infill using the specified layer thickness. For example, if the infill layer thickness is set to 0.2 mm and the layer height is set to 0.1 mm, the printer will print the outer walls and top and bottom layers for two layers and then print a single infill layer with a thickness of 0.2 mm.
By adjusting the infill layer thickness, you can achieve a balance between printing speed and strength. Thicker infill layers can reduce printing time while also providing high strength to your print.
This is a great setting to save time, but this is also going to increase the amount of filament you’re using.
Gradual Infill Steps
“Gradual Infill Steps” is a setting in Cura that allows you to reduce the amount of infill used in your 3D print by decreasing the infill percentage in the lower layers – at the bottom of the model. The infill is gradually decreased as the printer moves down towards the bottom layers. The setting works by dividing the infill percentage by a factor of two for each gradual infill step.
For example, if the infill percentage is set to 20% and the gradual infill steps are set to 2, then the infill will be 20% for the top 5mm of the print, and then reduced to 10% for the rest of the print. This results in a dense infill near the top layers, where it is essential for strength, and a reduced print time for the rest of the print where the infill is less critical.
By using gradual infill, you can save time and material without sacrificing the overall strength of the print. However, it is important to note that reducing the infill percentage too much can create a weaker print.
Gradual Infill Step Height
By setting the “Gradual Infill Step Height”, you can control at which height the reduction of the density of the infill should start. This setting is measured based on the top layers of a print.
For example, if you want the infill to gradually reduce in density as you get closer to the top of the print, you can set a lower gradual infill step height. On the other hand, if you want the infill to stay dense for longer, you can set a higher gradual infill step height.
If you are looking to save filament, then this setting will definitely help you do that.
Infill Before Walls
If you have a 3D model that has a lot of overhangs, enabling the “Infill Before Walls” setting will tell the printer to start printing the infill before the walls of a 3D print. By default, Cura prints the walls first and then the infill. This setting allows you to swap the order of printing, which prints the infill first so the walls have something to adhere to. This is super helpful because it results in a smoother finish for overhanging parts of the model.

There is a potential drawback to this approach. If the infill is visible through the walls, it can result in a rougher surface finish. This happens because the walls may not be able to fully cover the infill, especially if the infill density is high or the walls are thin. In some cases, the infill may even be visible as small bumps or lines on the surface of the print.
Minimum Infill Area
The next setting is a vastly underutilized option, in my opinion. The “Minimum Infill Area” setting in Cura enables you to define the minimum area required for infill to be printed in a specific area of the print. When the minimum area required for infill is not met, Cura will print the area as skin instead of infill. This means that the printer will only lay down a single layer of material, as opposed to the pattern that would be used for infill. The measurement is in square millimeters.
If you’re like me and print 3D models for painting, then you will really like this setting. Let’s say your model has a fragile, thin, narrow part like a sword or something that can break easily. This setting will determine if the print area for the infill is hollow or has a gap (too small of an area for the infill pattern to print) and will print that space solid, making that part of the print much stronger.
For example, a flat roof with a thin chimney might need some extra support to keep the chimney from collapsing during printing. With the minimum infill area setting, you can define a minimum area for the chimney, and Cura will print it with infill instead of skin, giving it the necessary strength without adding too much weight or wasting material.
I love this setting and use it all the time for my prints.
By adjusting the minimum infill area setting, you can customize the print to suit your needs and ensure that each part of the print is strong enough to withstand the stresses it will encounter.
Infill Support
This next setting is an absolute gem. Aren’t you glad you stuck with me until the end of this insanely long article?!
The “Infill Support” setting creates internal support structures inside a model in areas that are challenging for the printer to print.
Infill supports are fantastic because they act like external supports, but only on the inside, producing infill only where it’s absolutely needed to be able to print your 3D model.
Keep in mind that printing them throughout the entire object can result in longer print times and more material usage.
So, to reduce print time and material usage, we can print infill structures only where the tops of the model need support. However, this can lead to uneven object strength. Experimentation is needed here, but remember, the inside of the print doesn’t need to look pretty.
Skin Edge Support Thickness
The “Skin Edge Support Thickness” setting in Cura adjusts the thickness of the extra infill that is added to support the edges of a 3D model that has curved surfaces, like a human face or a ball. This extra infill helps prevent the edges of the print from sagging or collapsing during printing.
You can increase this value a little bit, but for the most part, I like to leave this setting at the default because all of the other settings we’ve talked about throughout this article – alternate layers, overlap, etc. – those settings are giving my print the extra support it needs, so I don’t really ever need to mess with this setting.

So one thing about this setting, if you do want to change it, is that you will have to make sure that it is a multiple of your layer height. If you get into crazy numbers that aren’t multiples of your layer height, Cura will automatically round up or down.
So that’s it! Those are all of the infill patterns and settings in Cura. I know this was a lengthy one, and all of these settings can be overwhelming – and these are just the infill settings. Just start tinkering and experimenting with one setting at a time, and you will find that you will get higher quality prints because the infill plays such a huge part in creating awesome 3D-printed models.